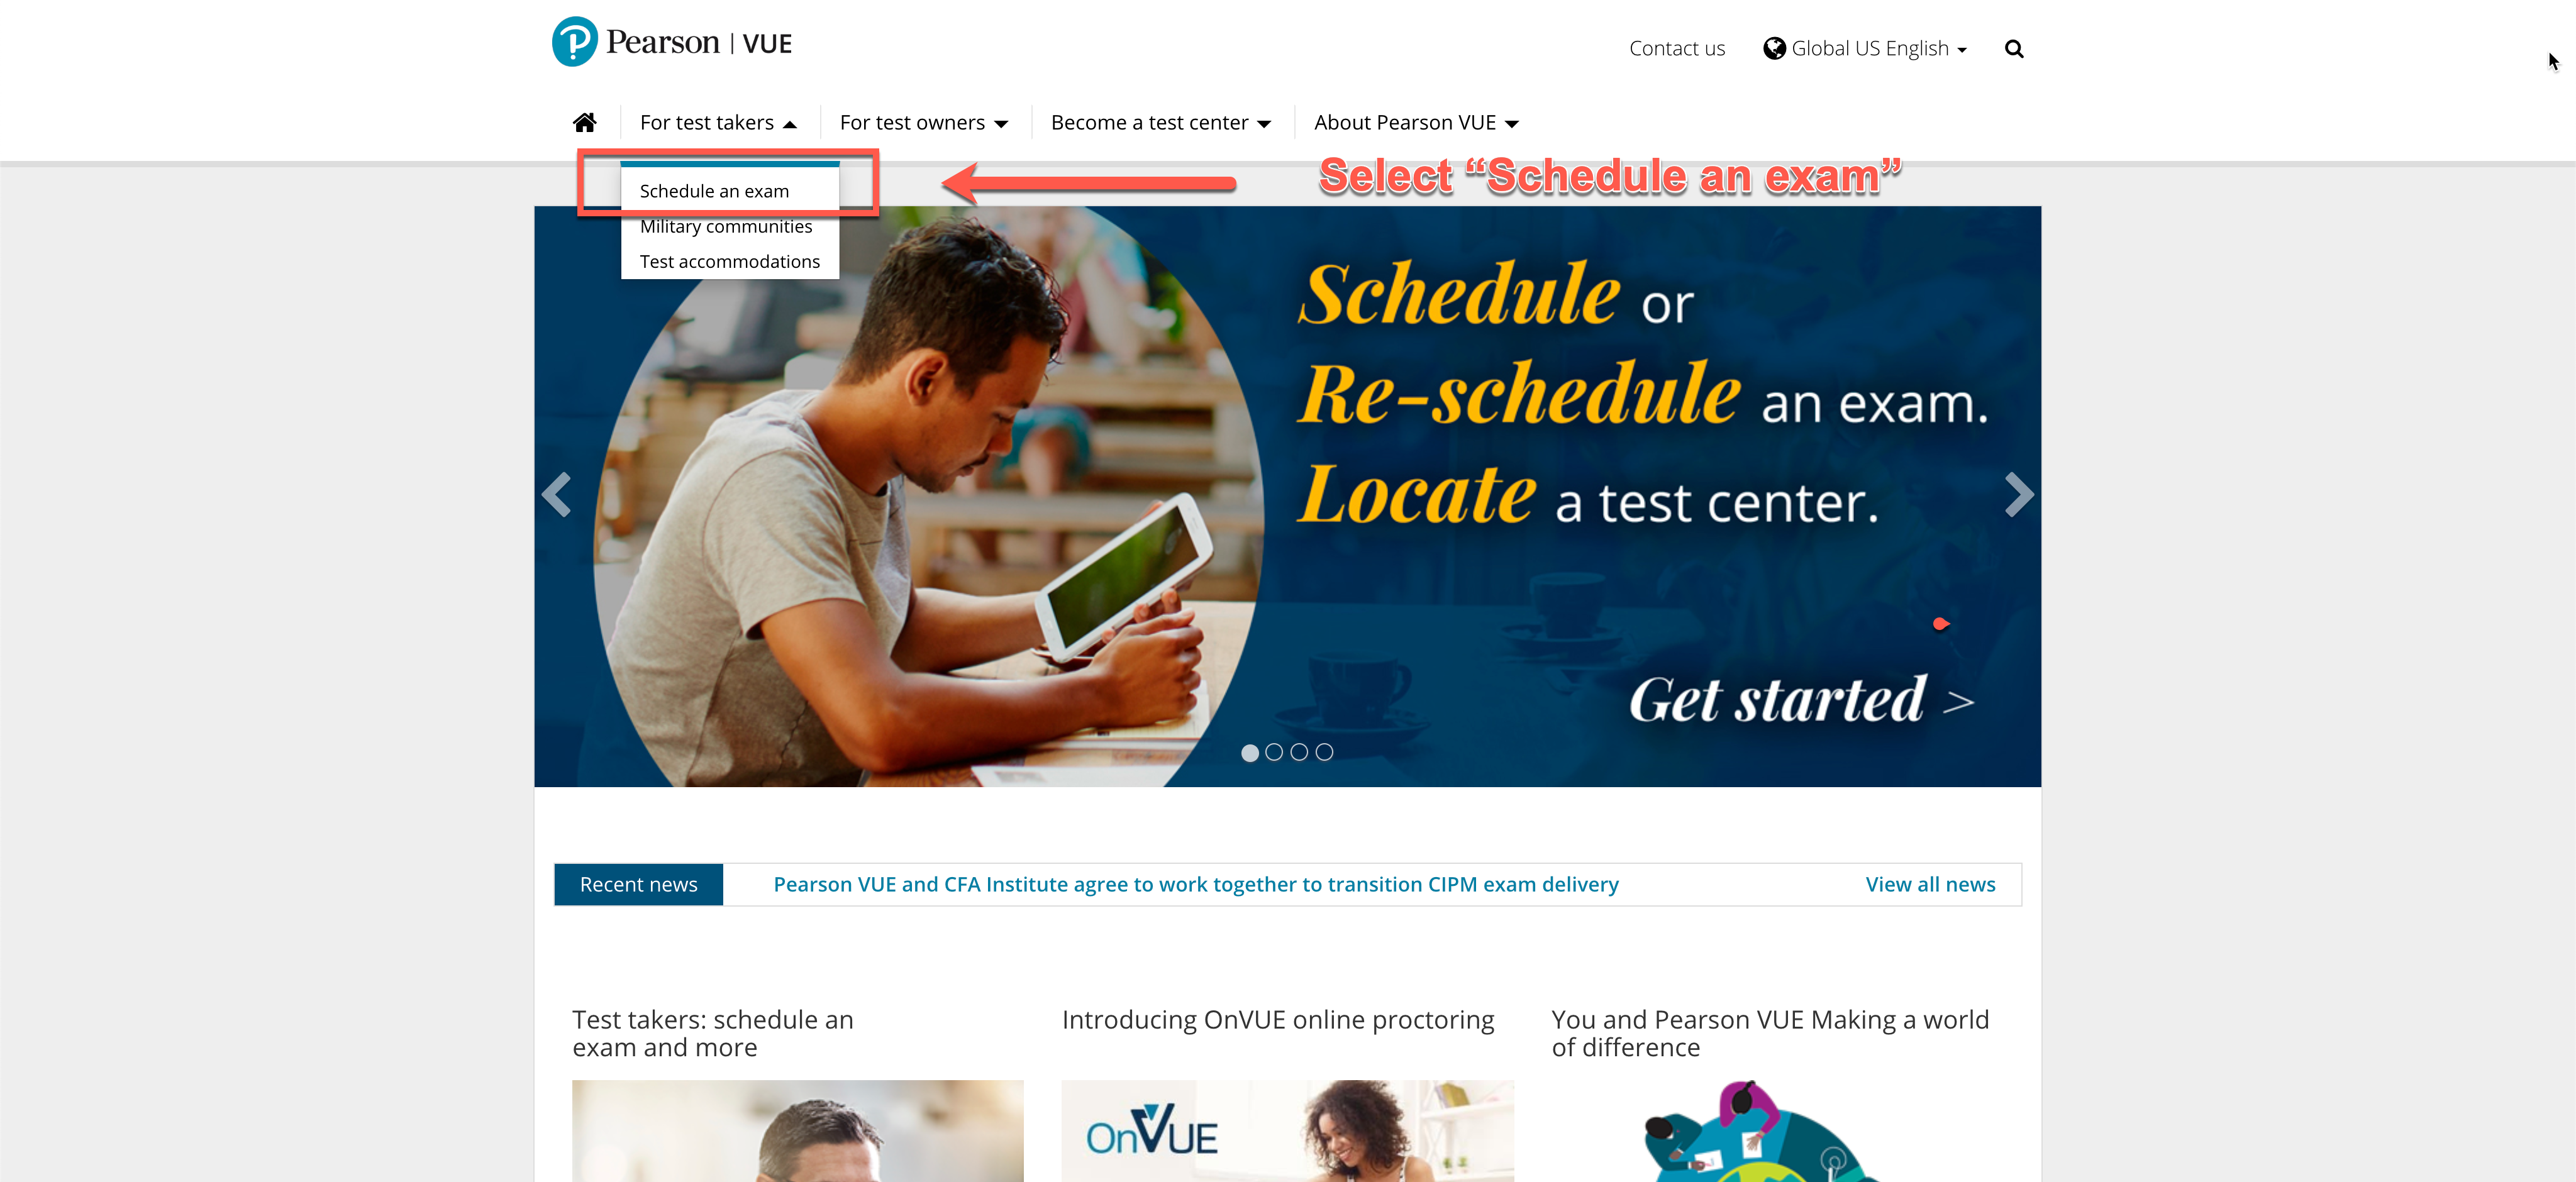
Step 01 - Select "Schedule an exam"
Go to the Pearson VUE Website https://pearsonvue.com. Select then the menu option “For test takers/Schedule an exam” .
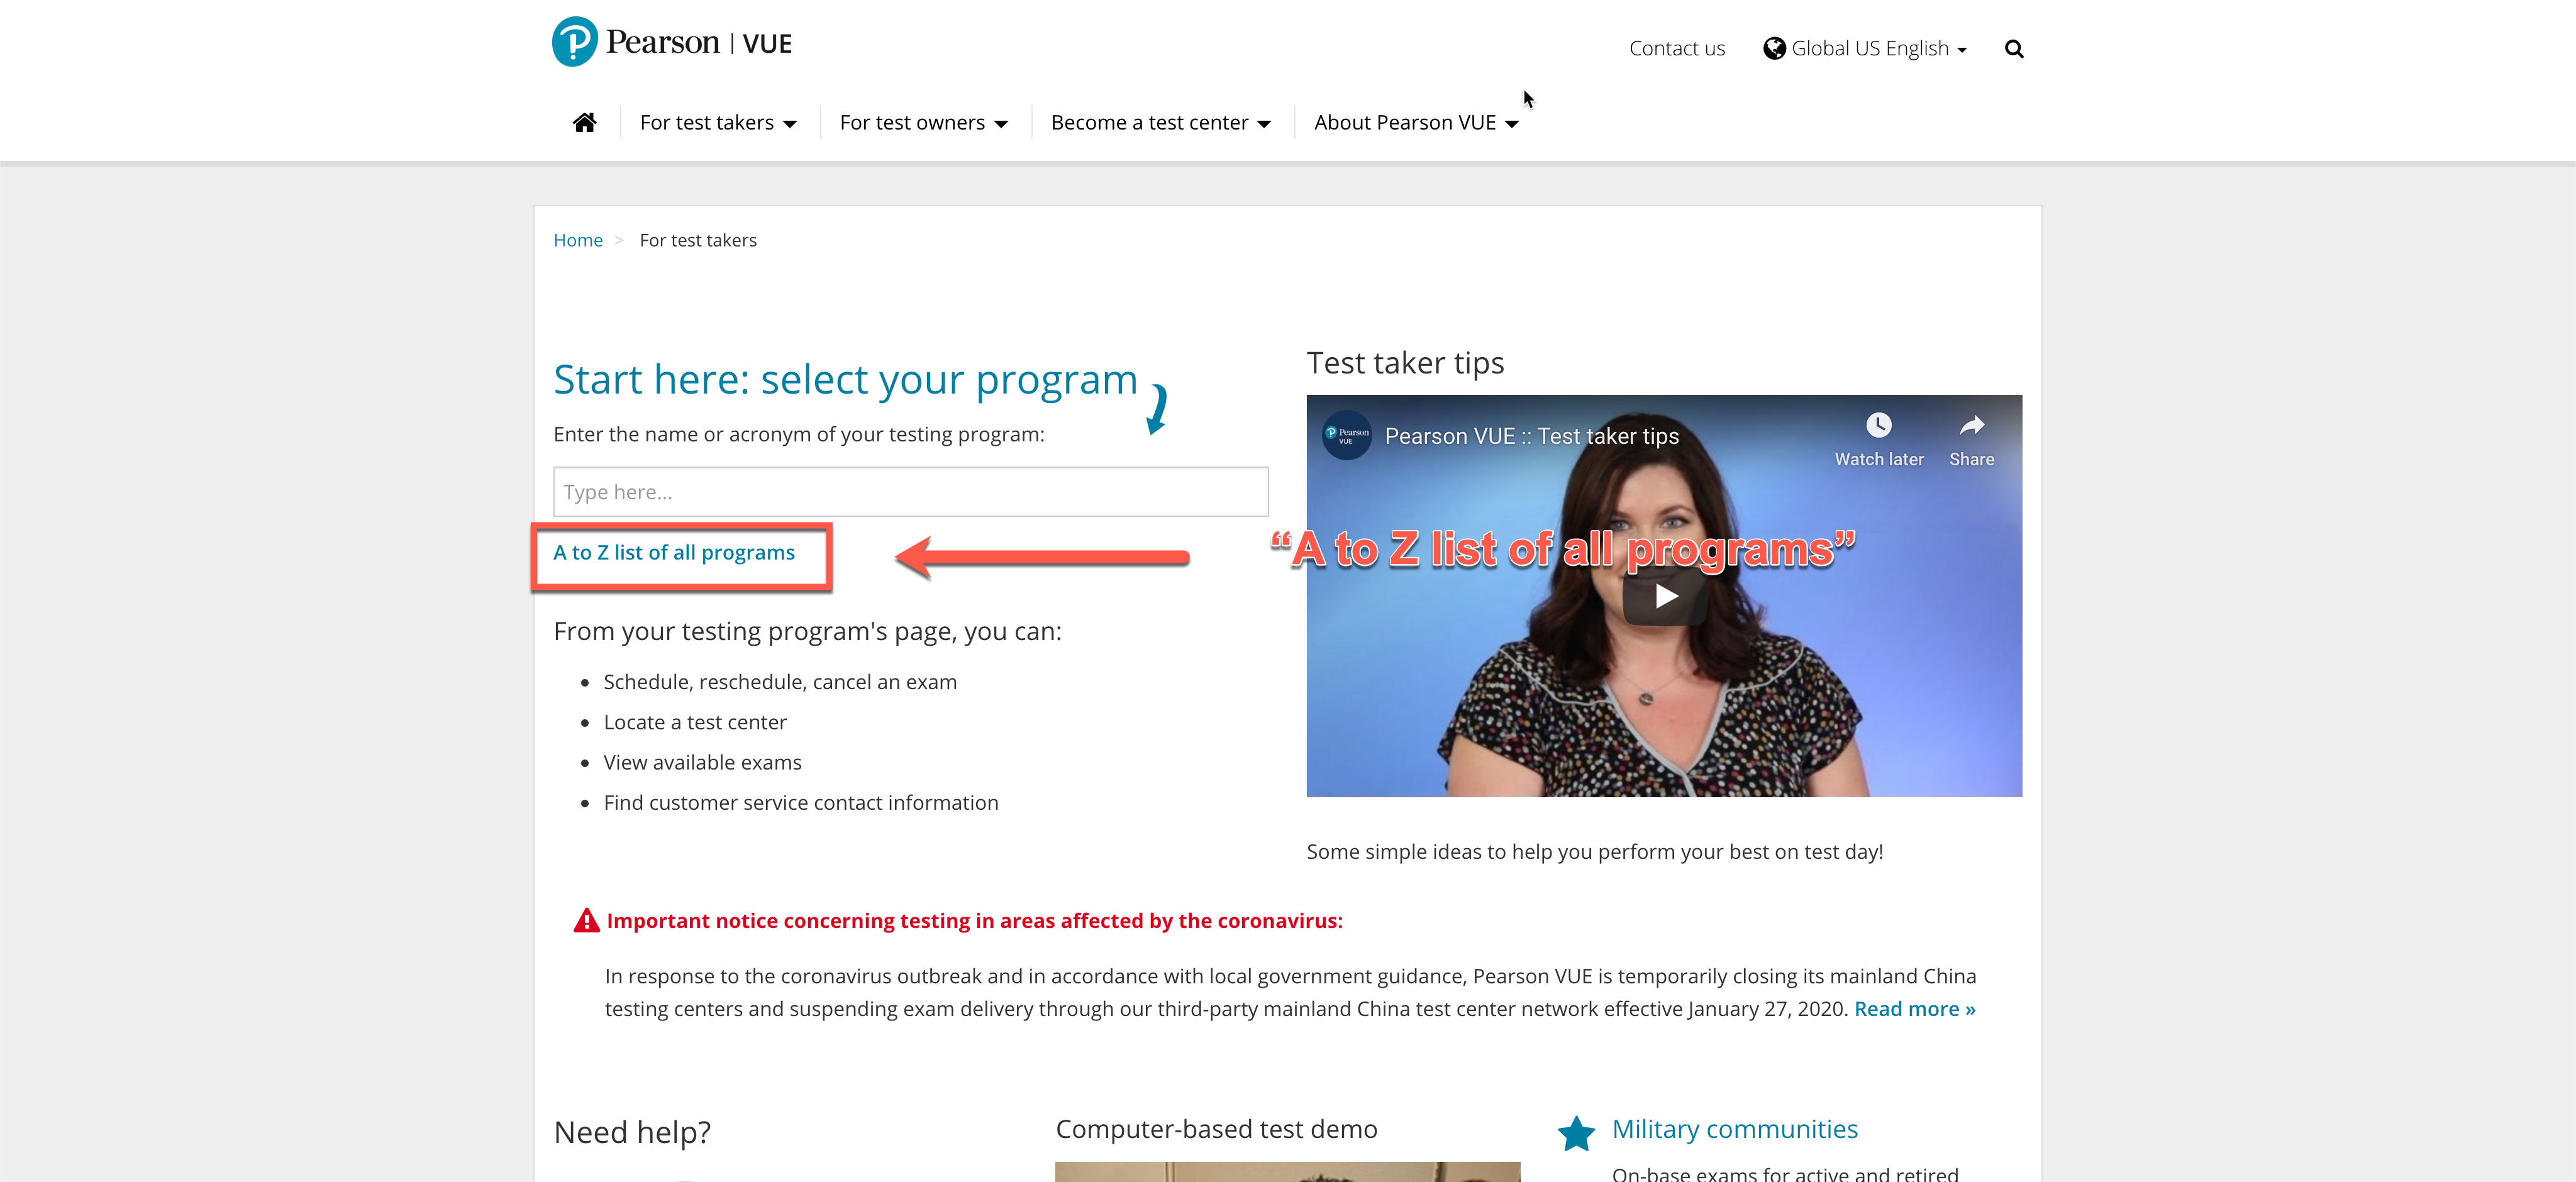
Step 02 – Select “A to Z list of all programs”.
Display all available programs.
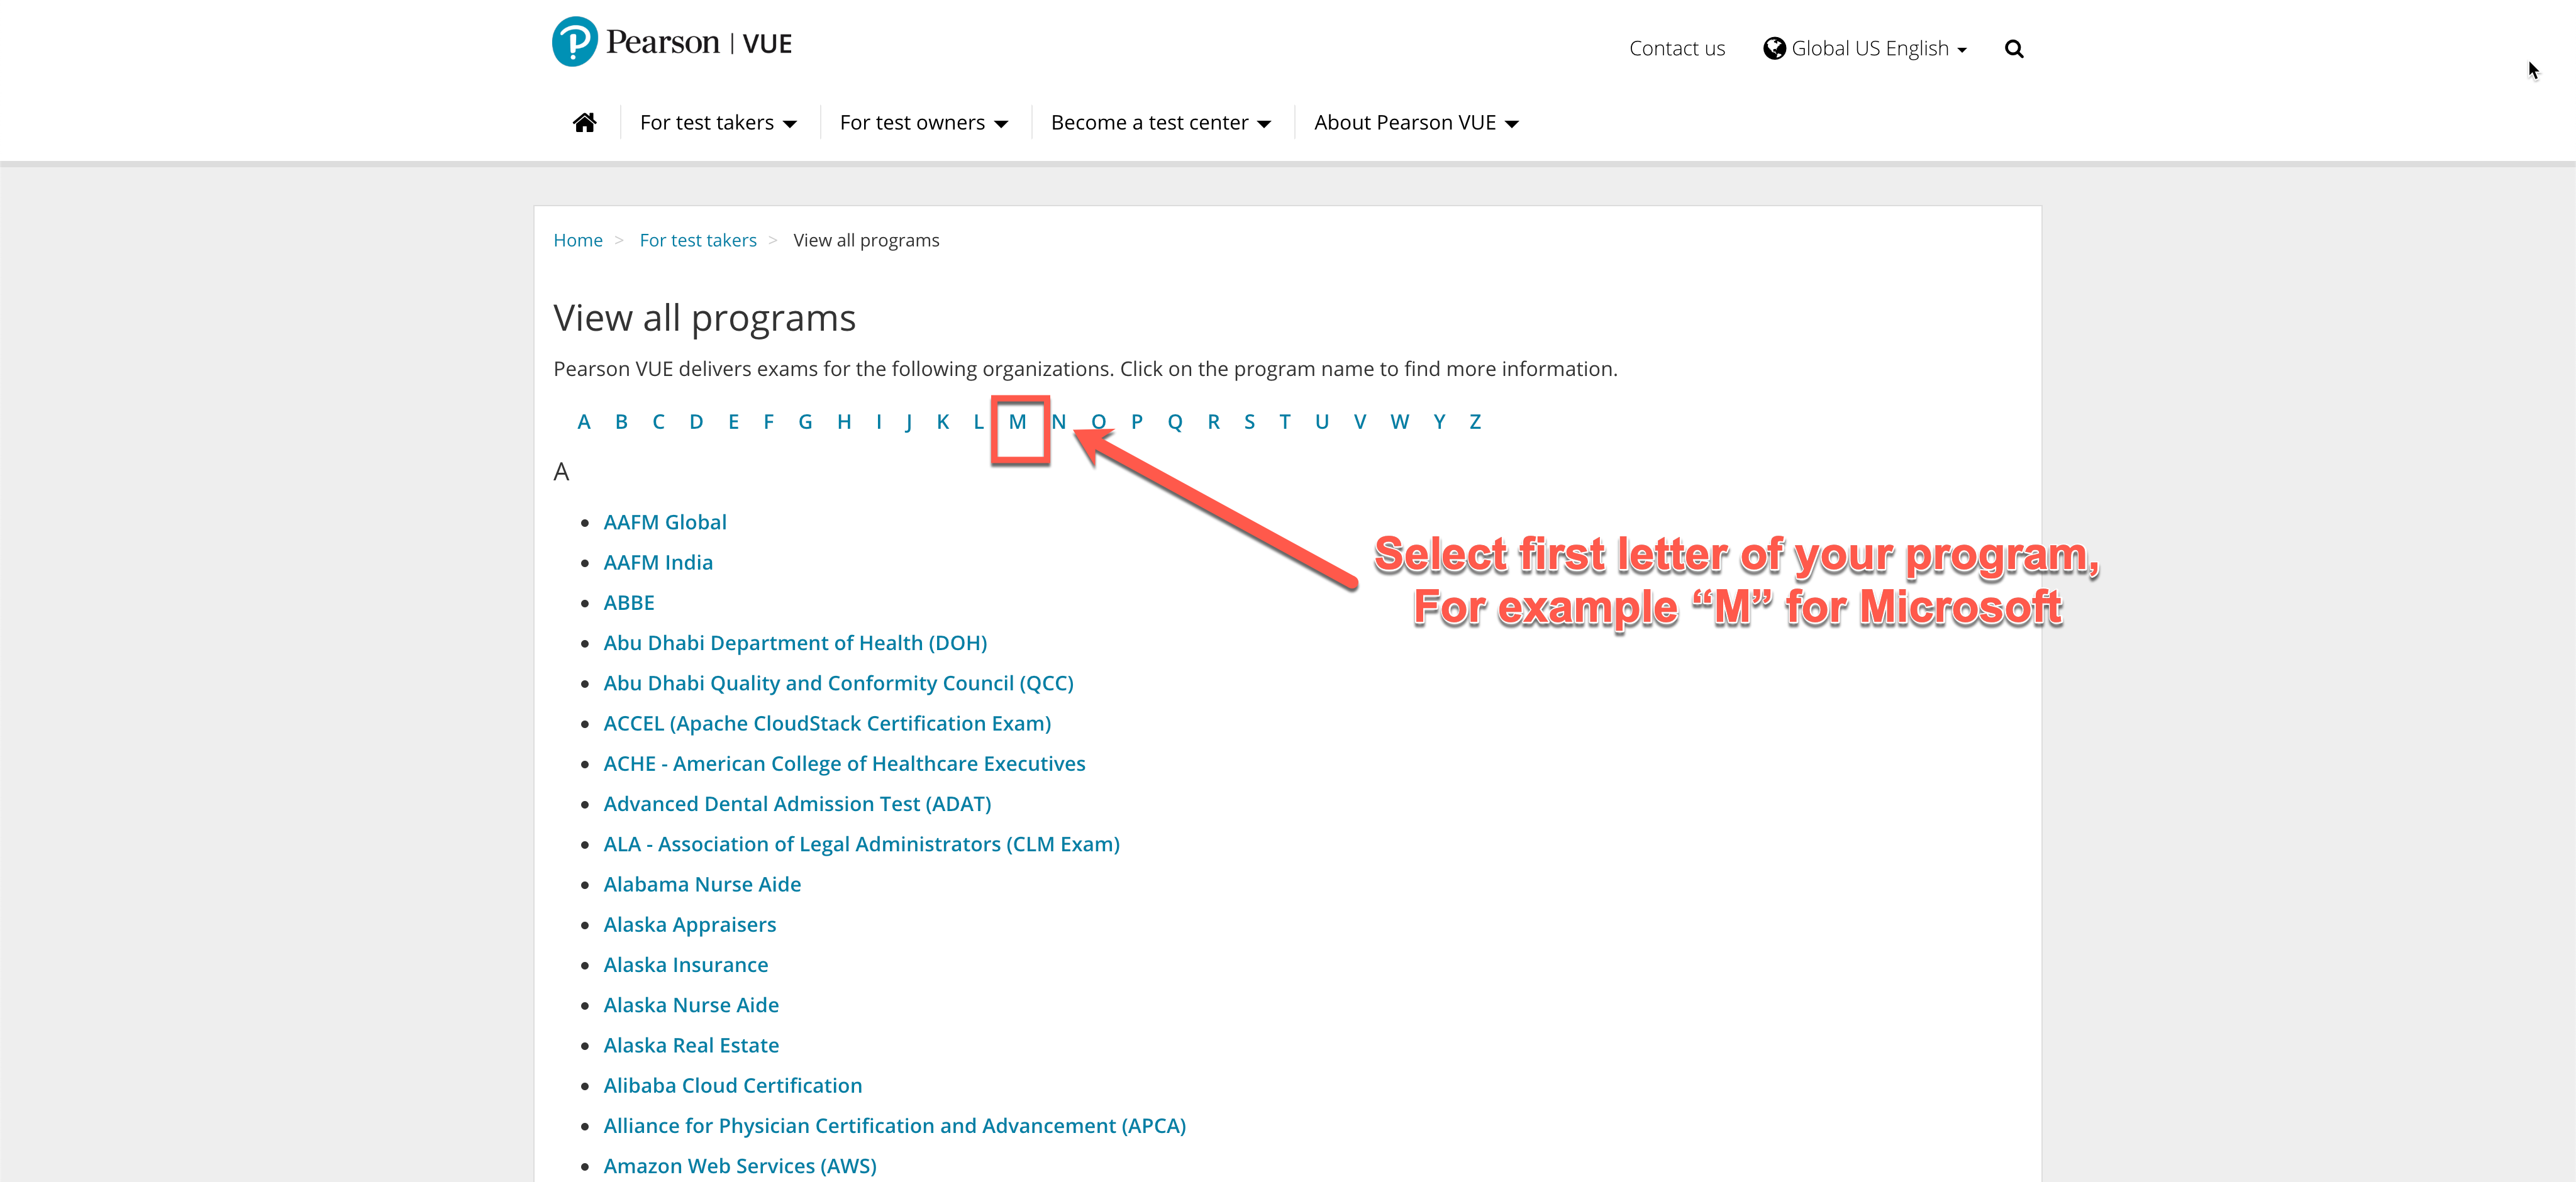
Step 03 – Select your program by its first letter.
Select then your program by its first letter. Here in the example we assume a “Microsoft” program/exam.
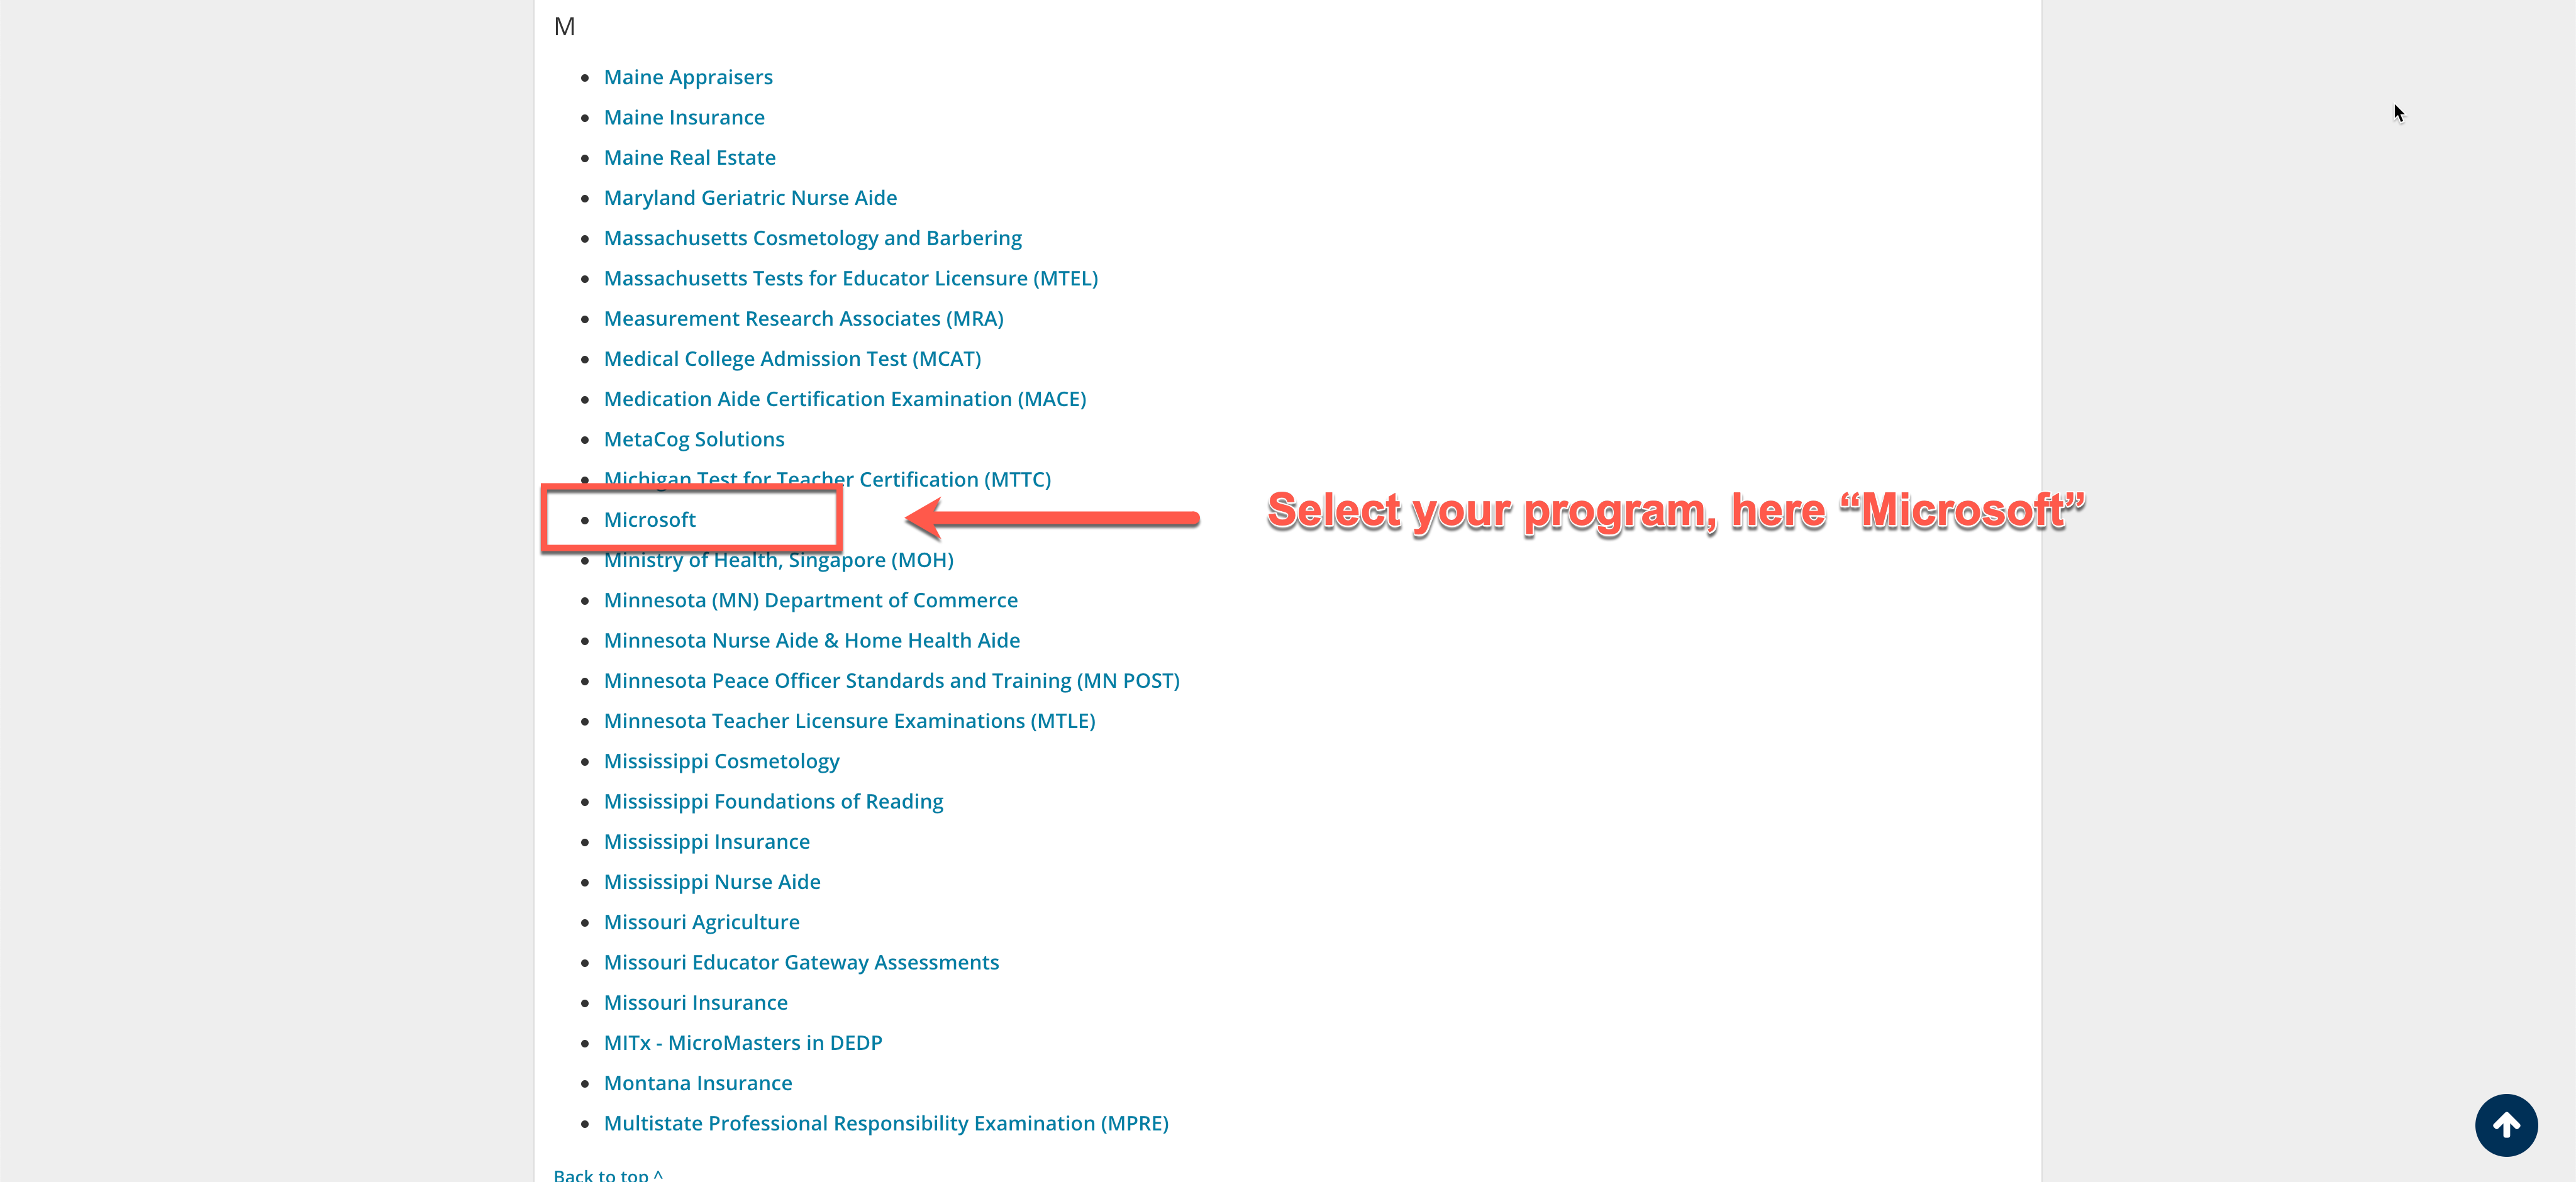
Step 04 – Select the program entity.
Here the program entity will be Microsoft as an example.

Step 05 – Scroll down the page to select “Register for an exam”.
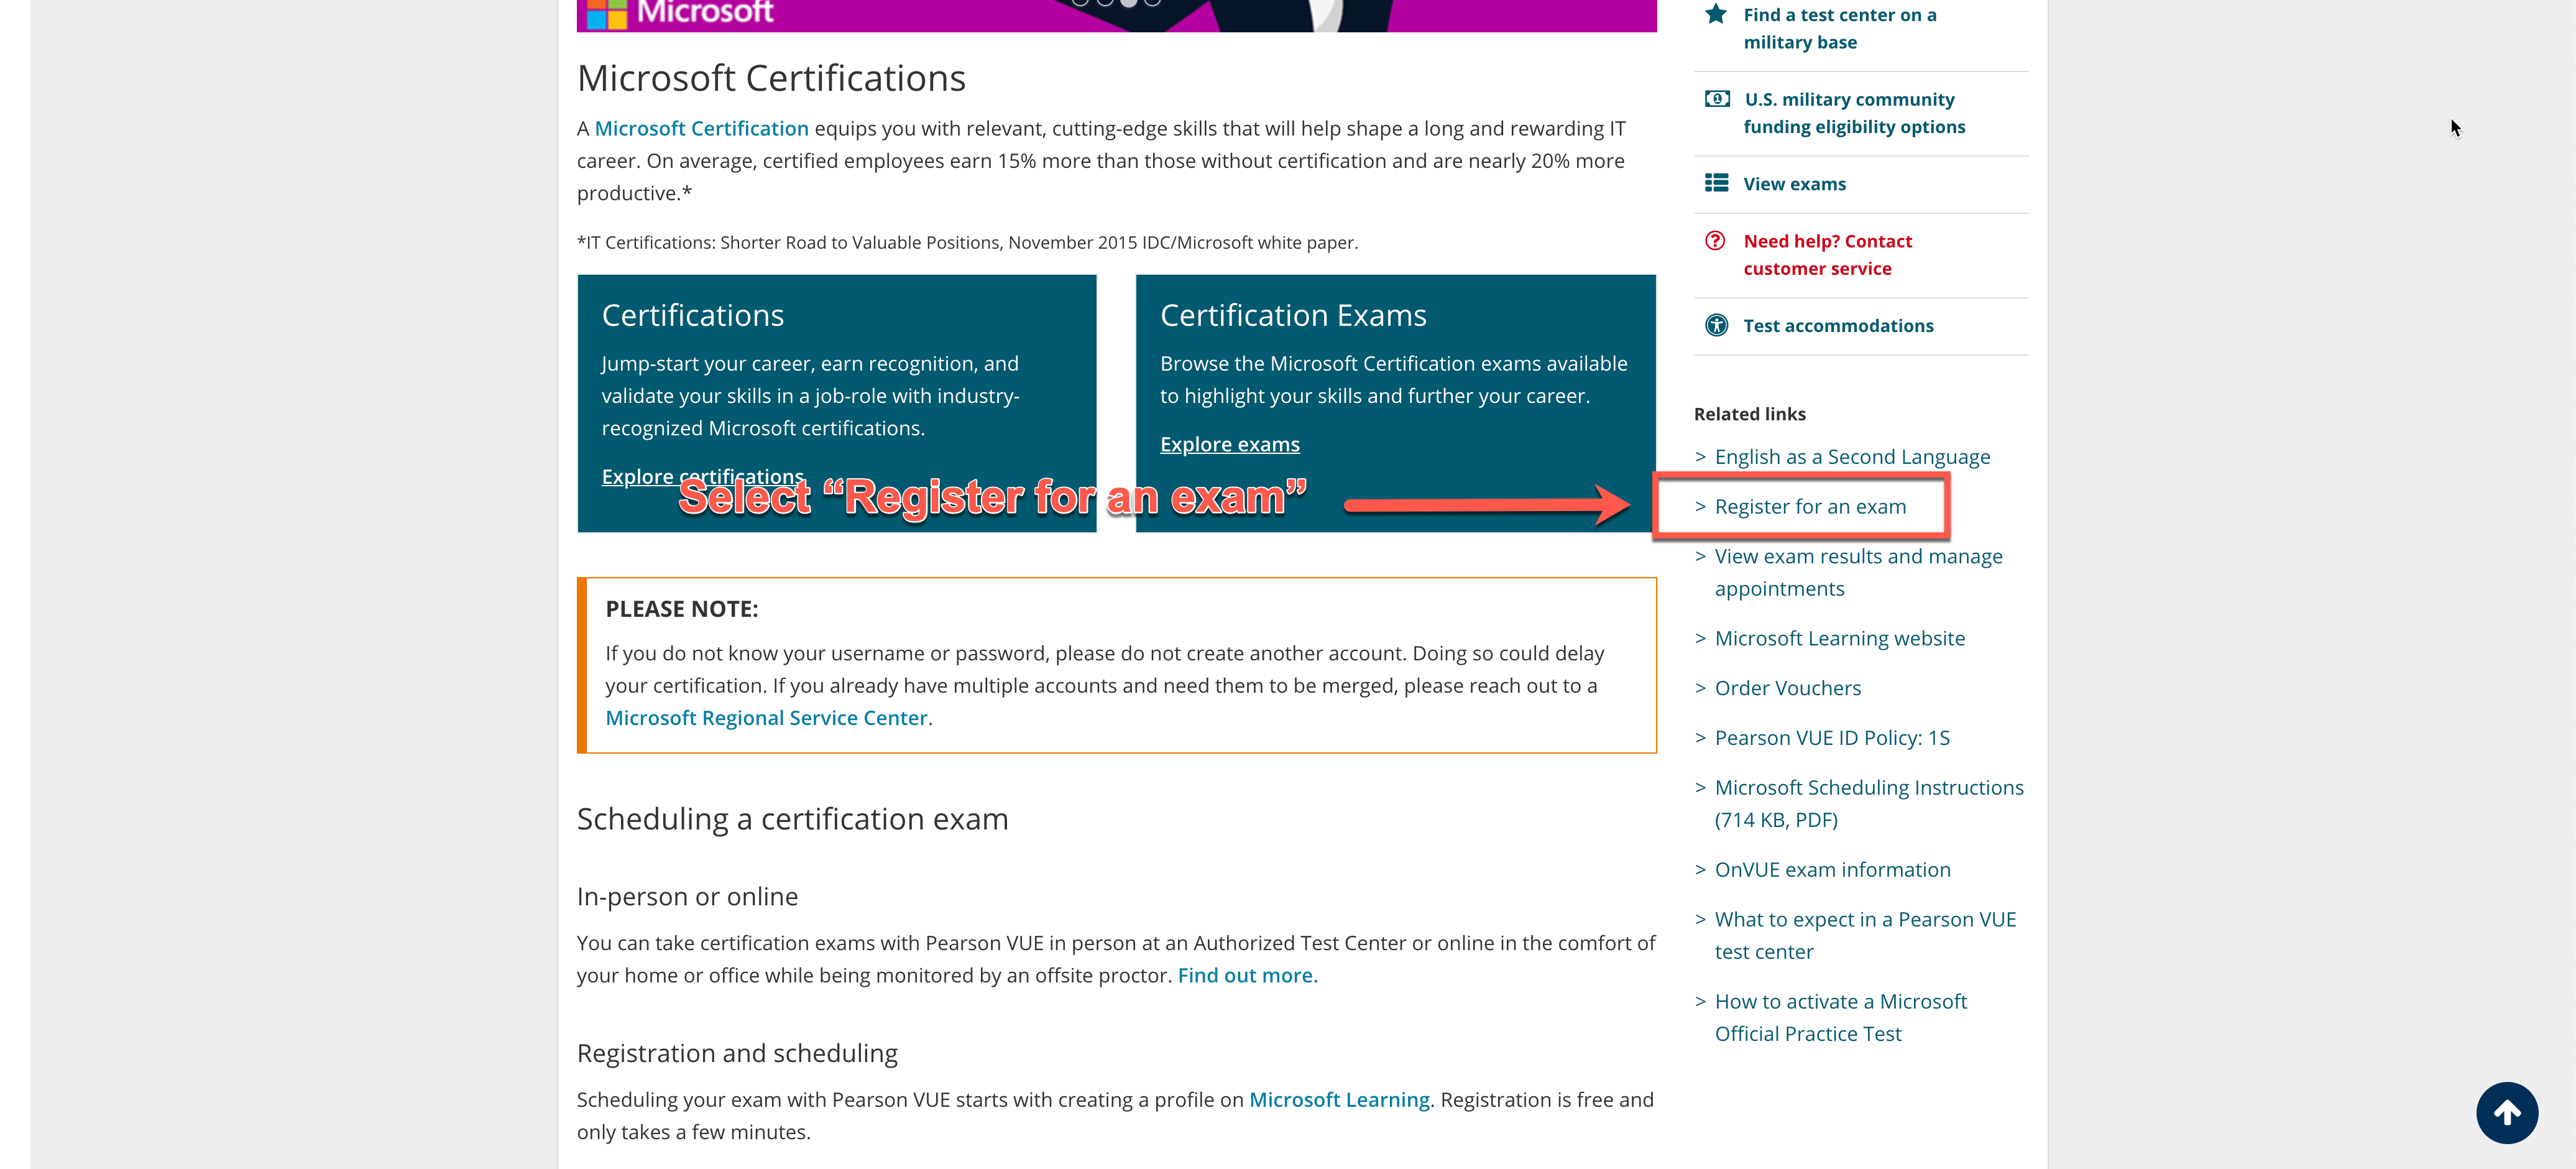
Step 06 – Select “Register for an exam”.
Please note that you need to sign in to your account to register to an exam. If you do not have an account yet please follow the next instructions to sign up.
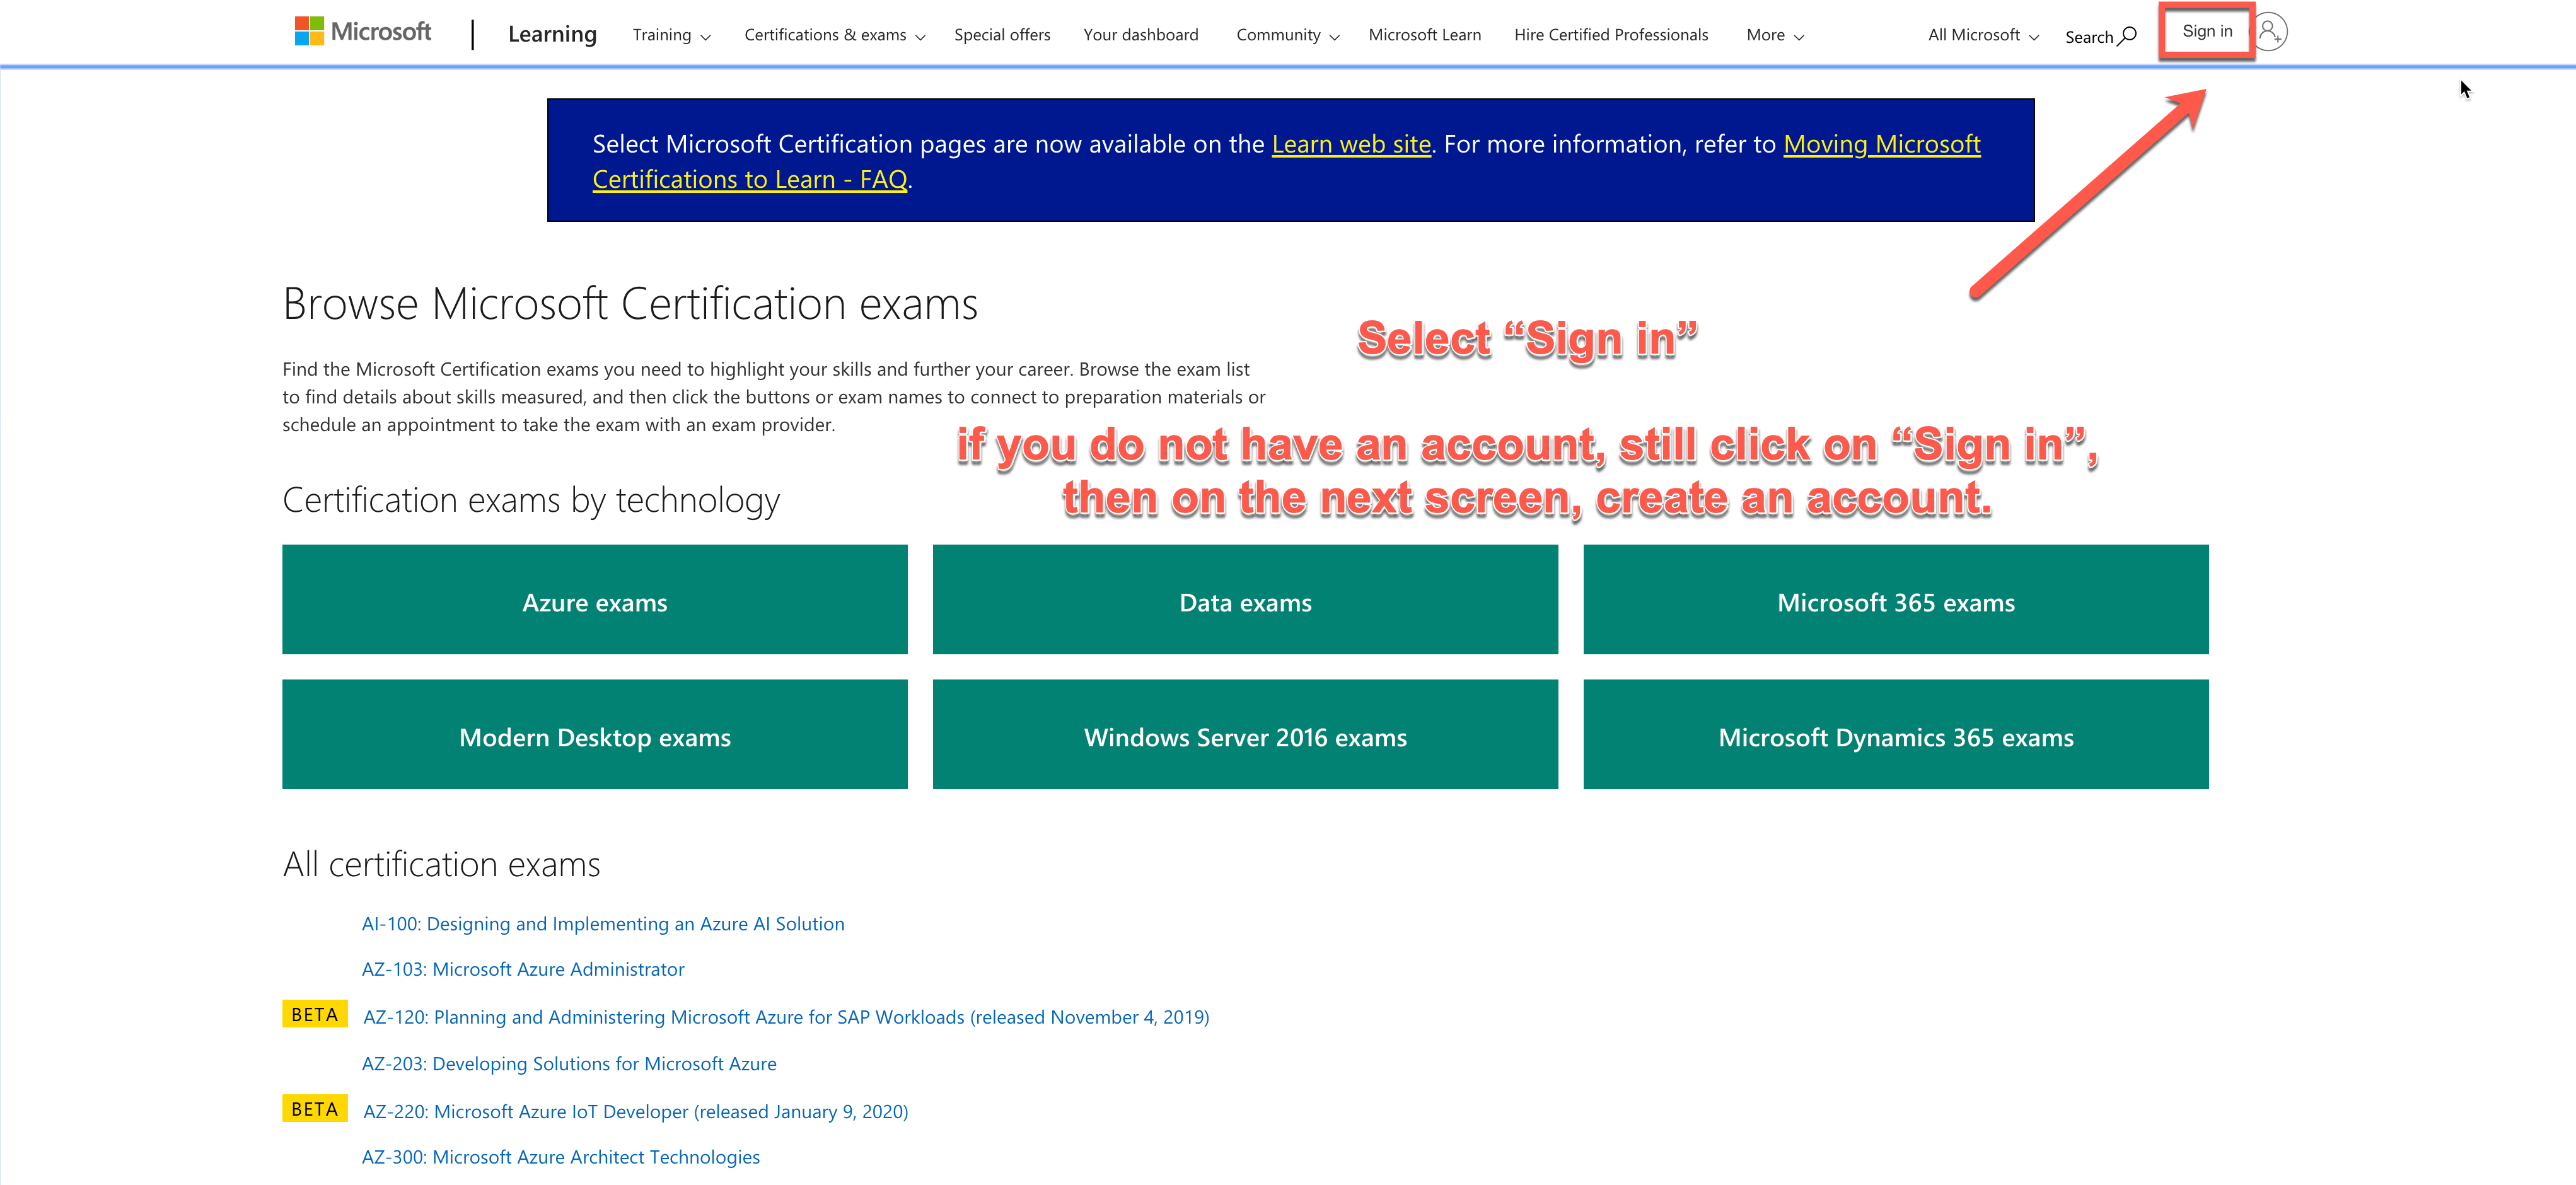
Step 07 – Sign in if you have an account or sign up.
You need to have a Microsoft account to sign in. The sign in or the sign up will be proposed during the screen appearing when you click on the “Sign in” link. if you do not have an account yet, please use option “Sign up” to create an account.
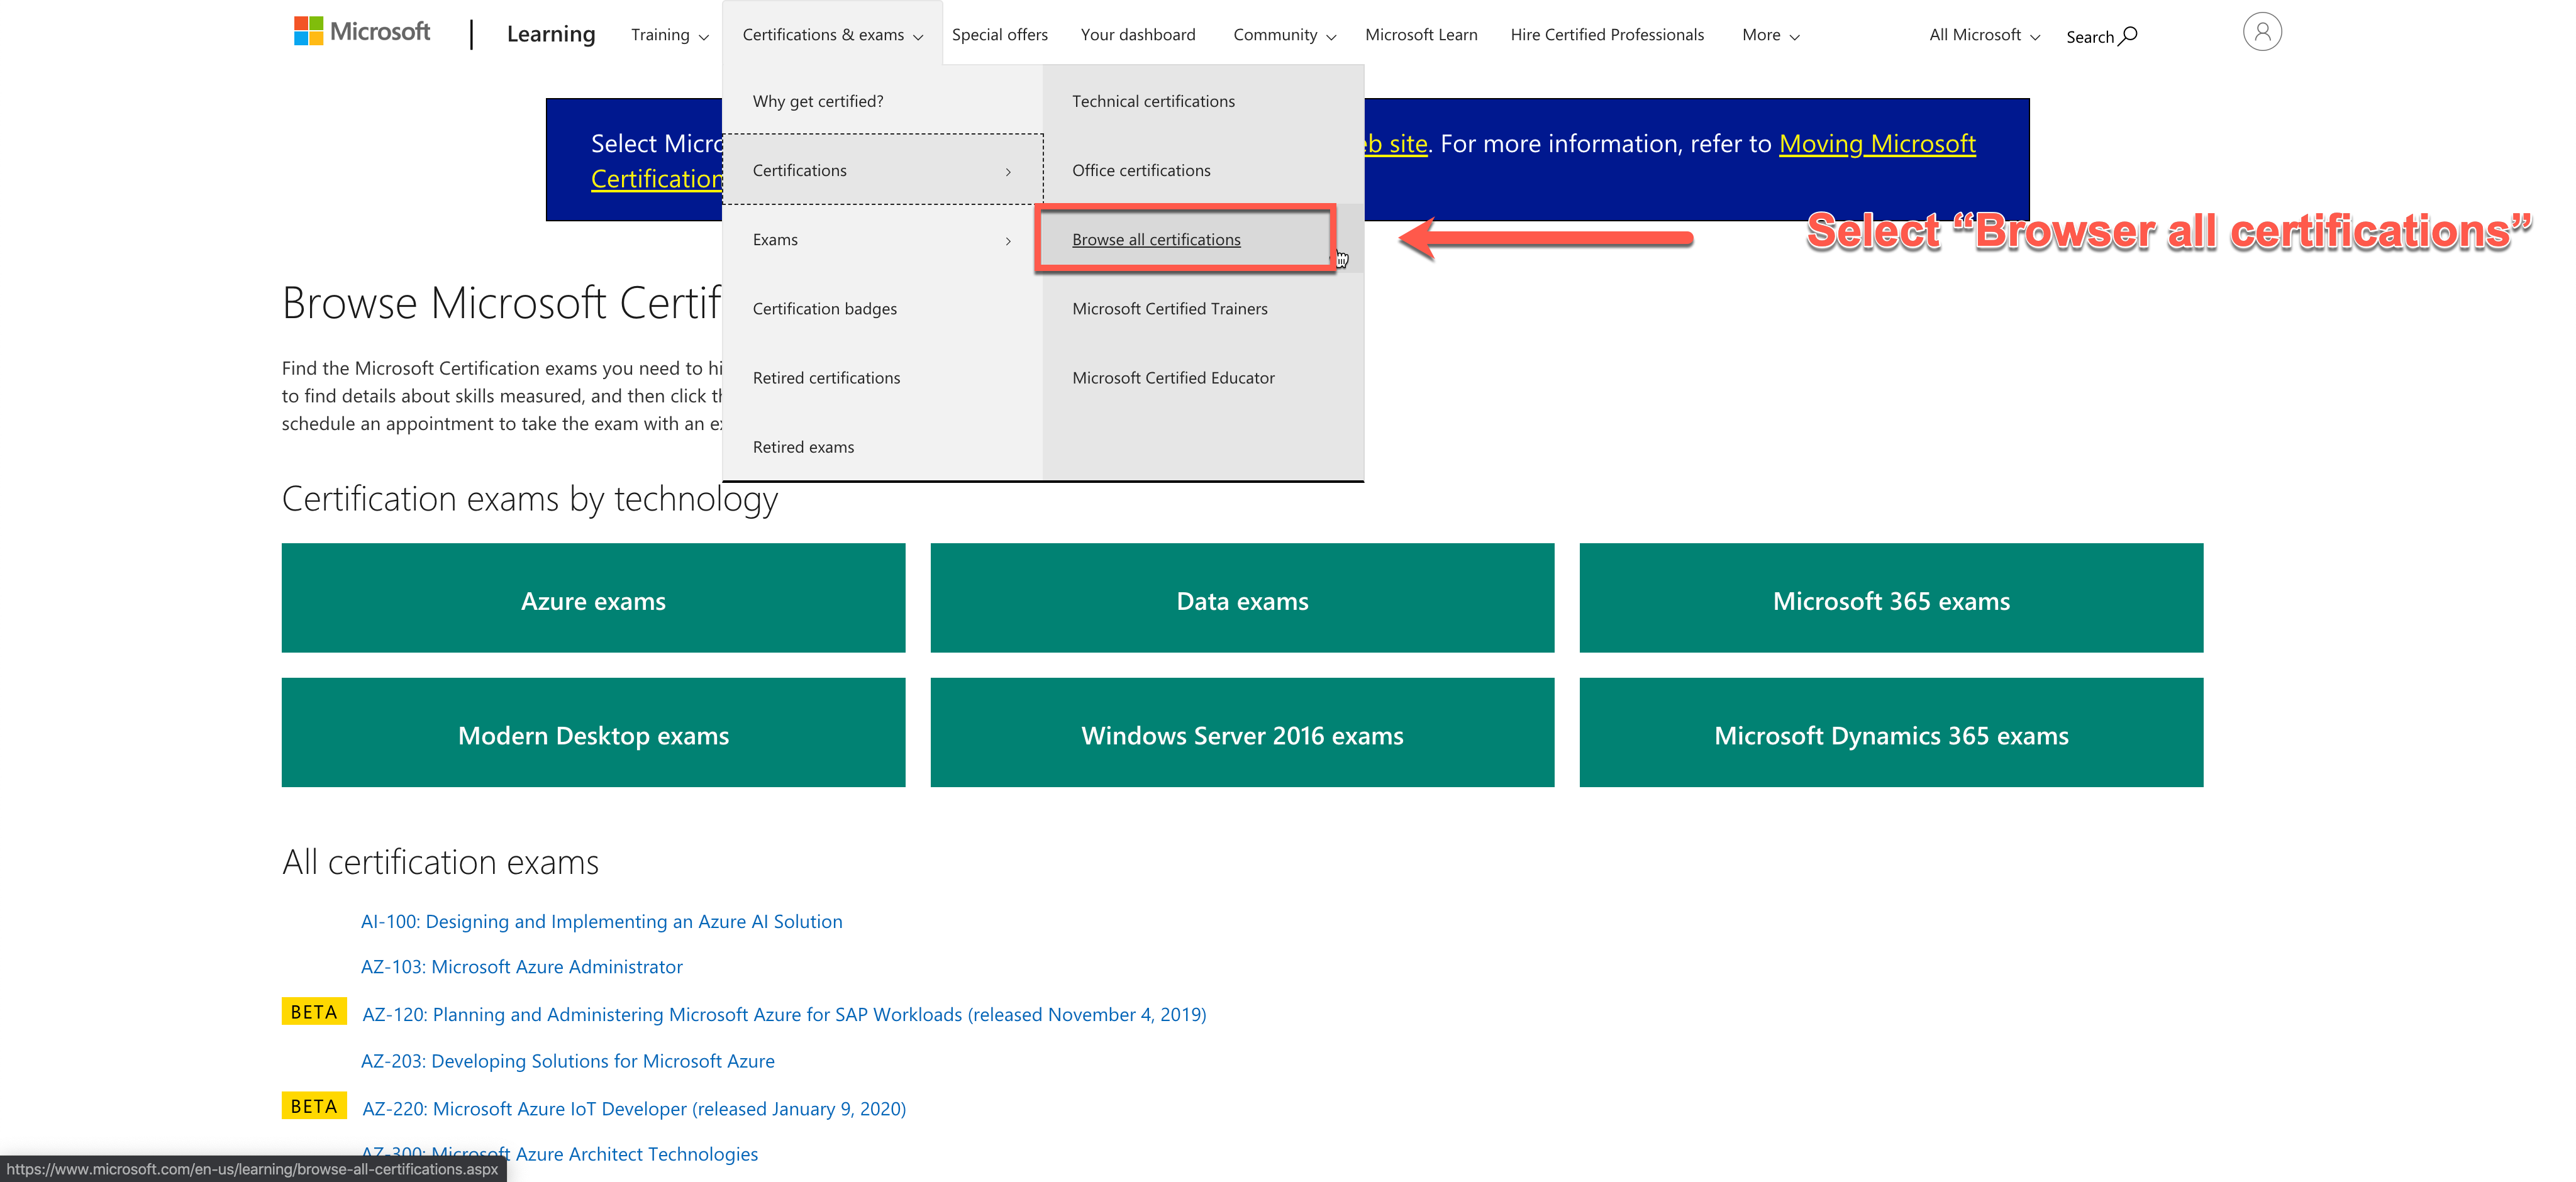
Step 08 – Choose your exam.
Now you need to choose your exam. Select the menu “Certification & exams / certifications / Browse all certifications” in order to display all the available certifications available.
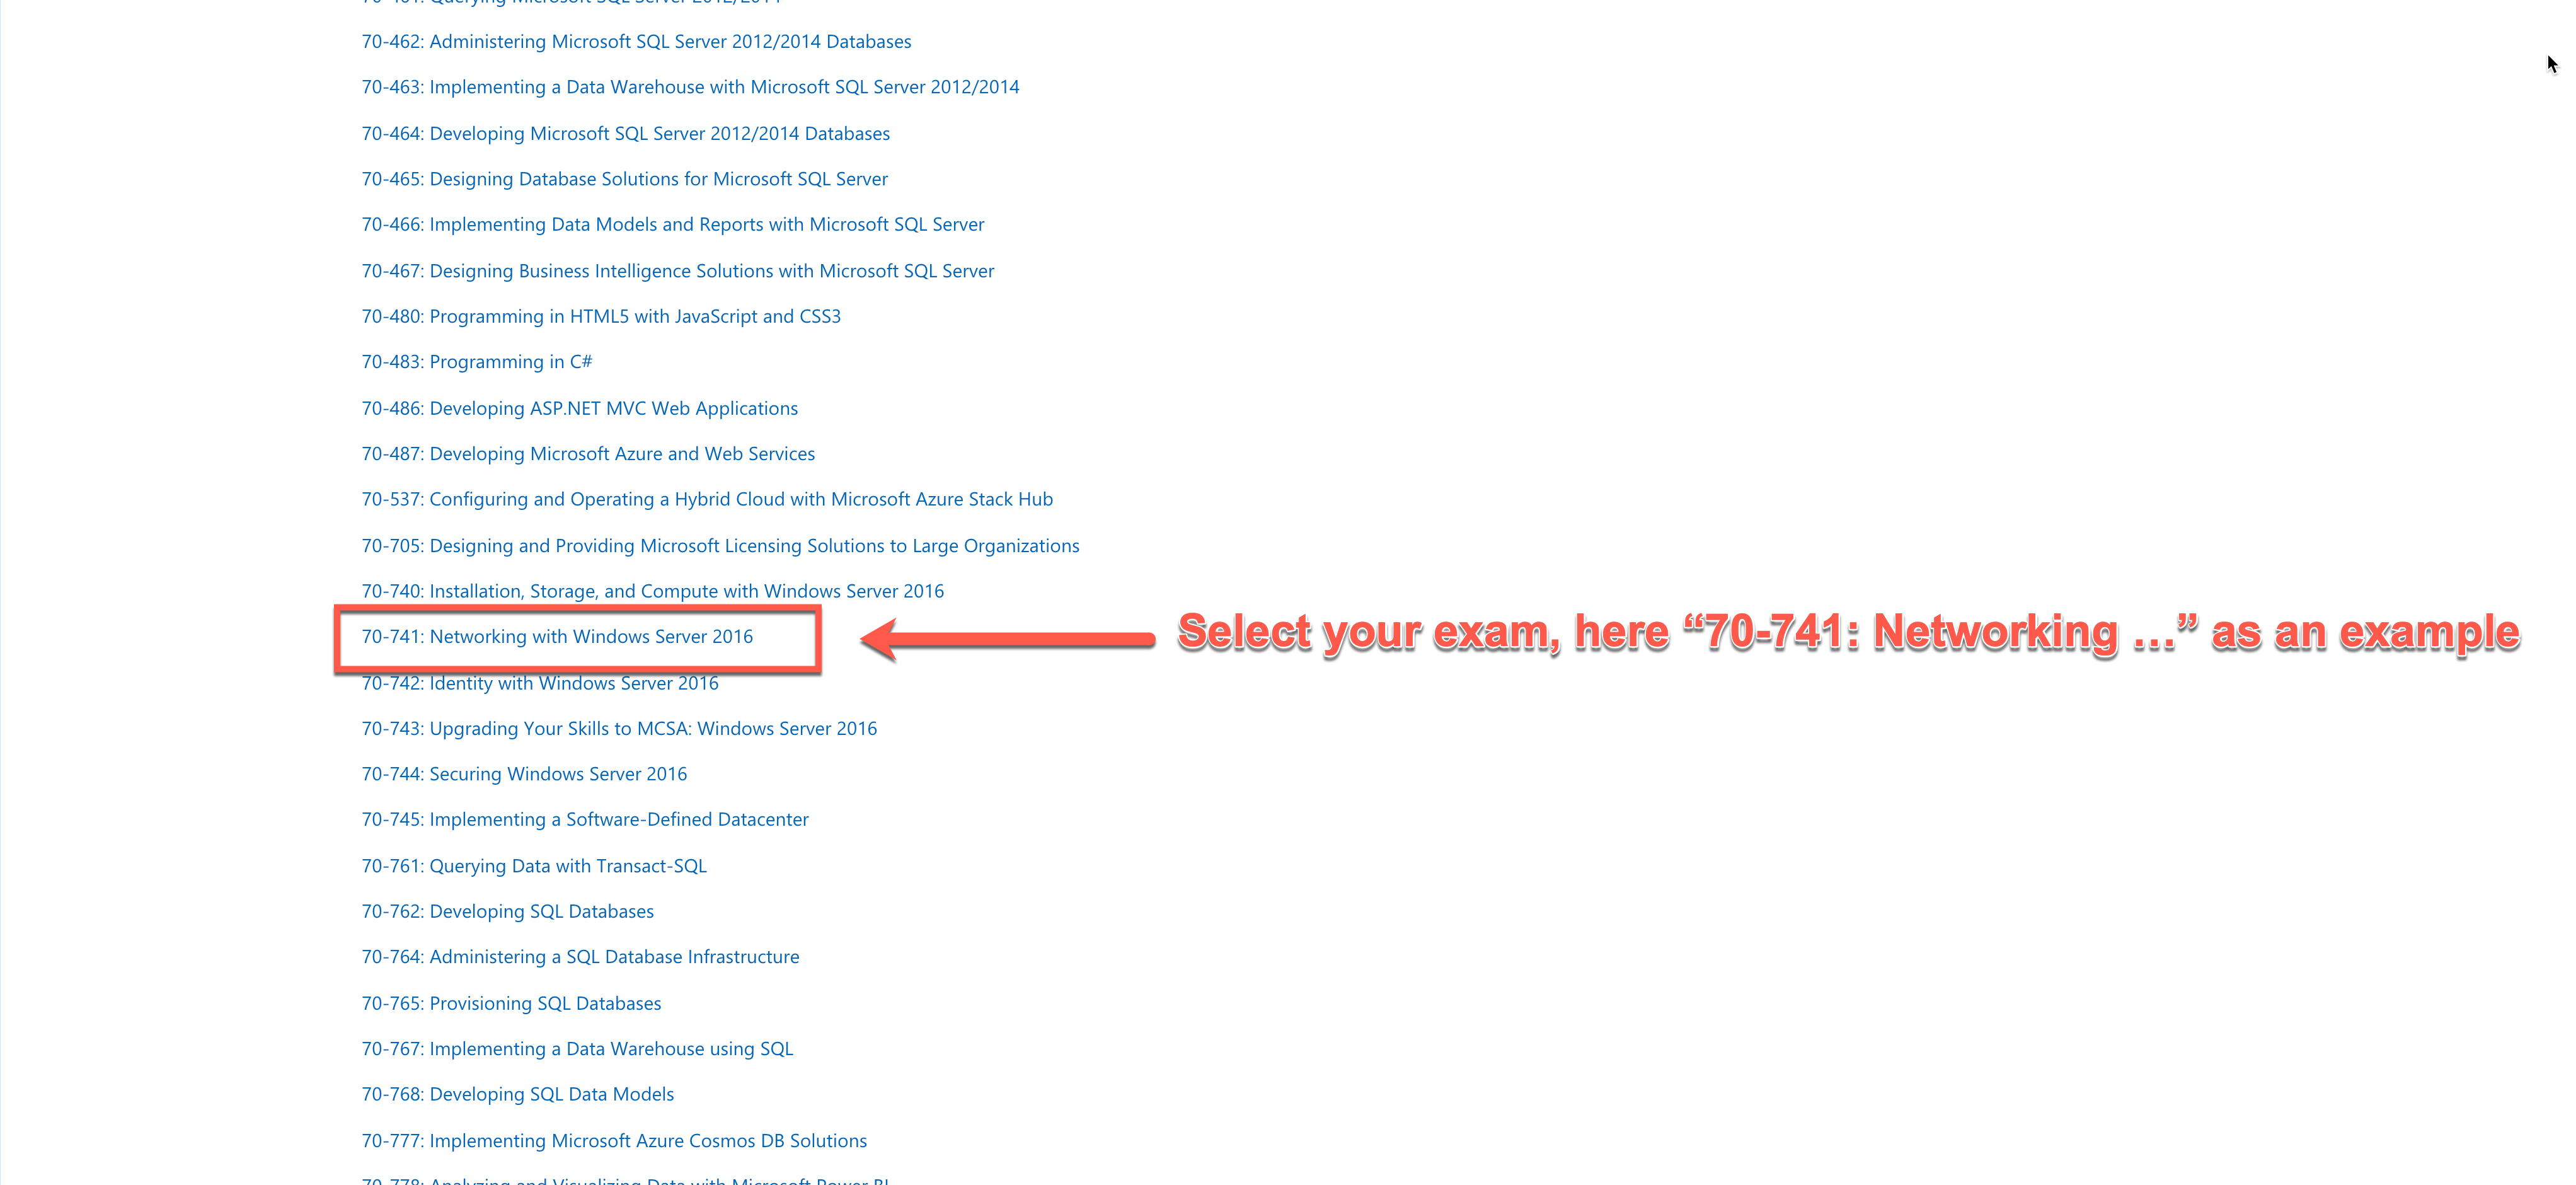
Step 09 – Choose your exam in the list “All certification exams”
Scroll down to the section “All certification exams” and choose your exam. For the example we will select the “70-741: Networking with Windows Server 2016” exam.
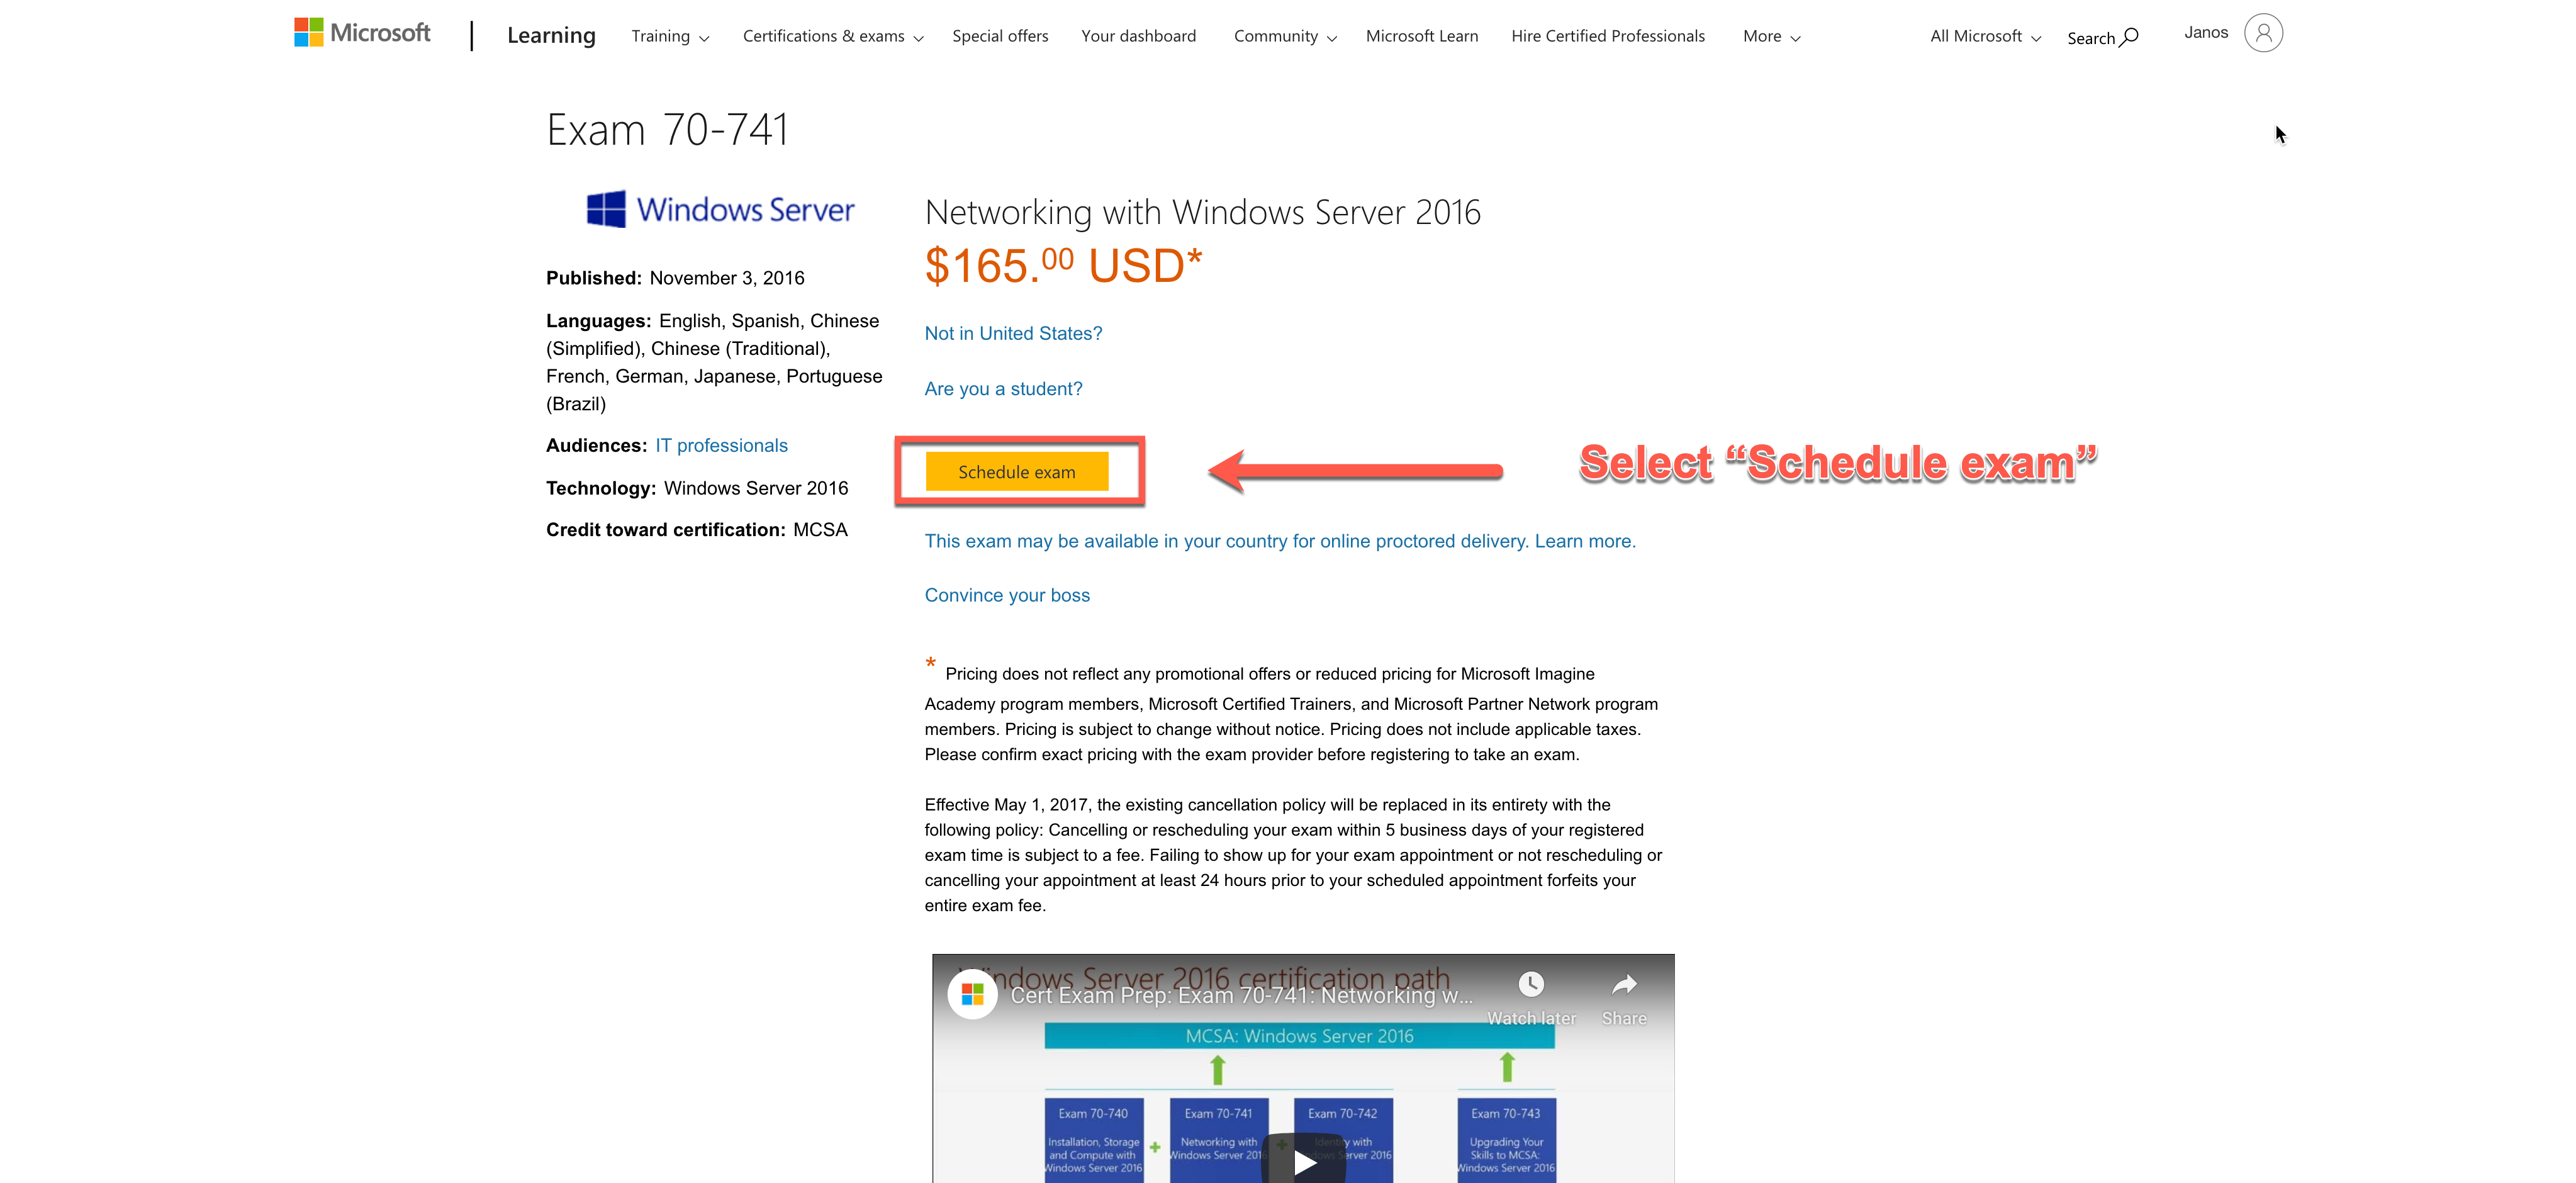
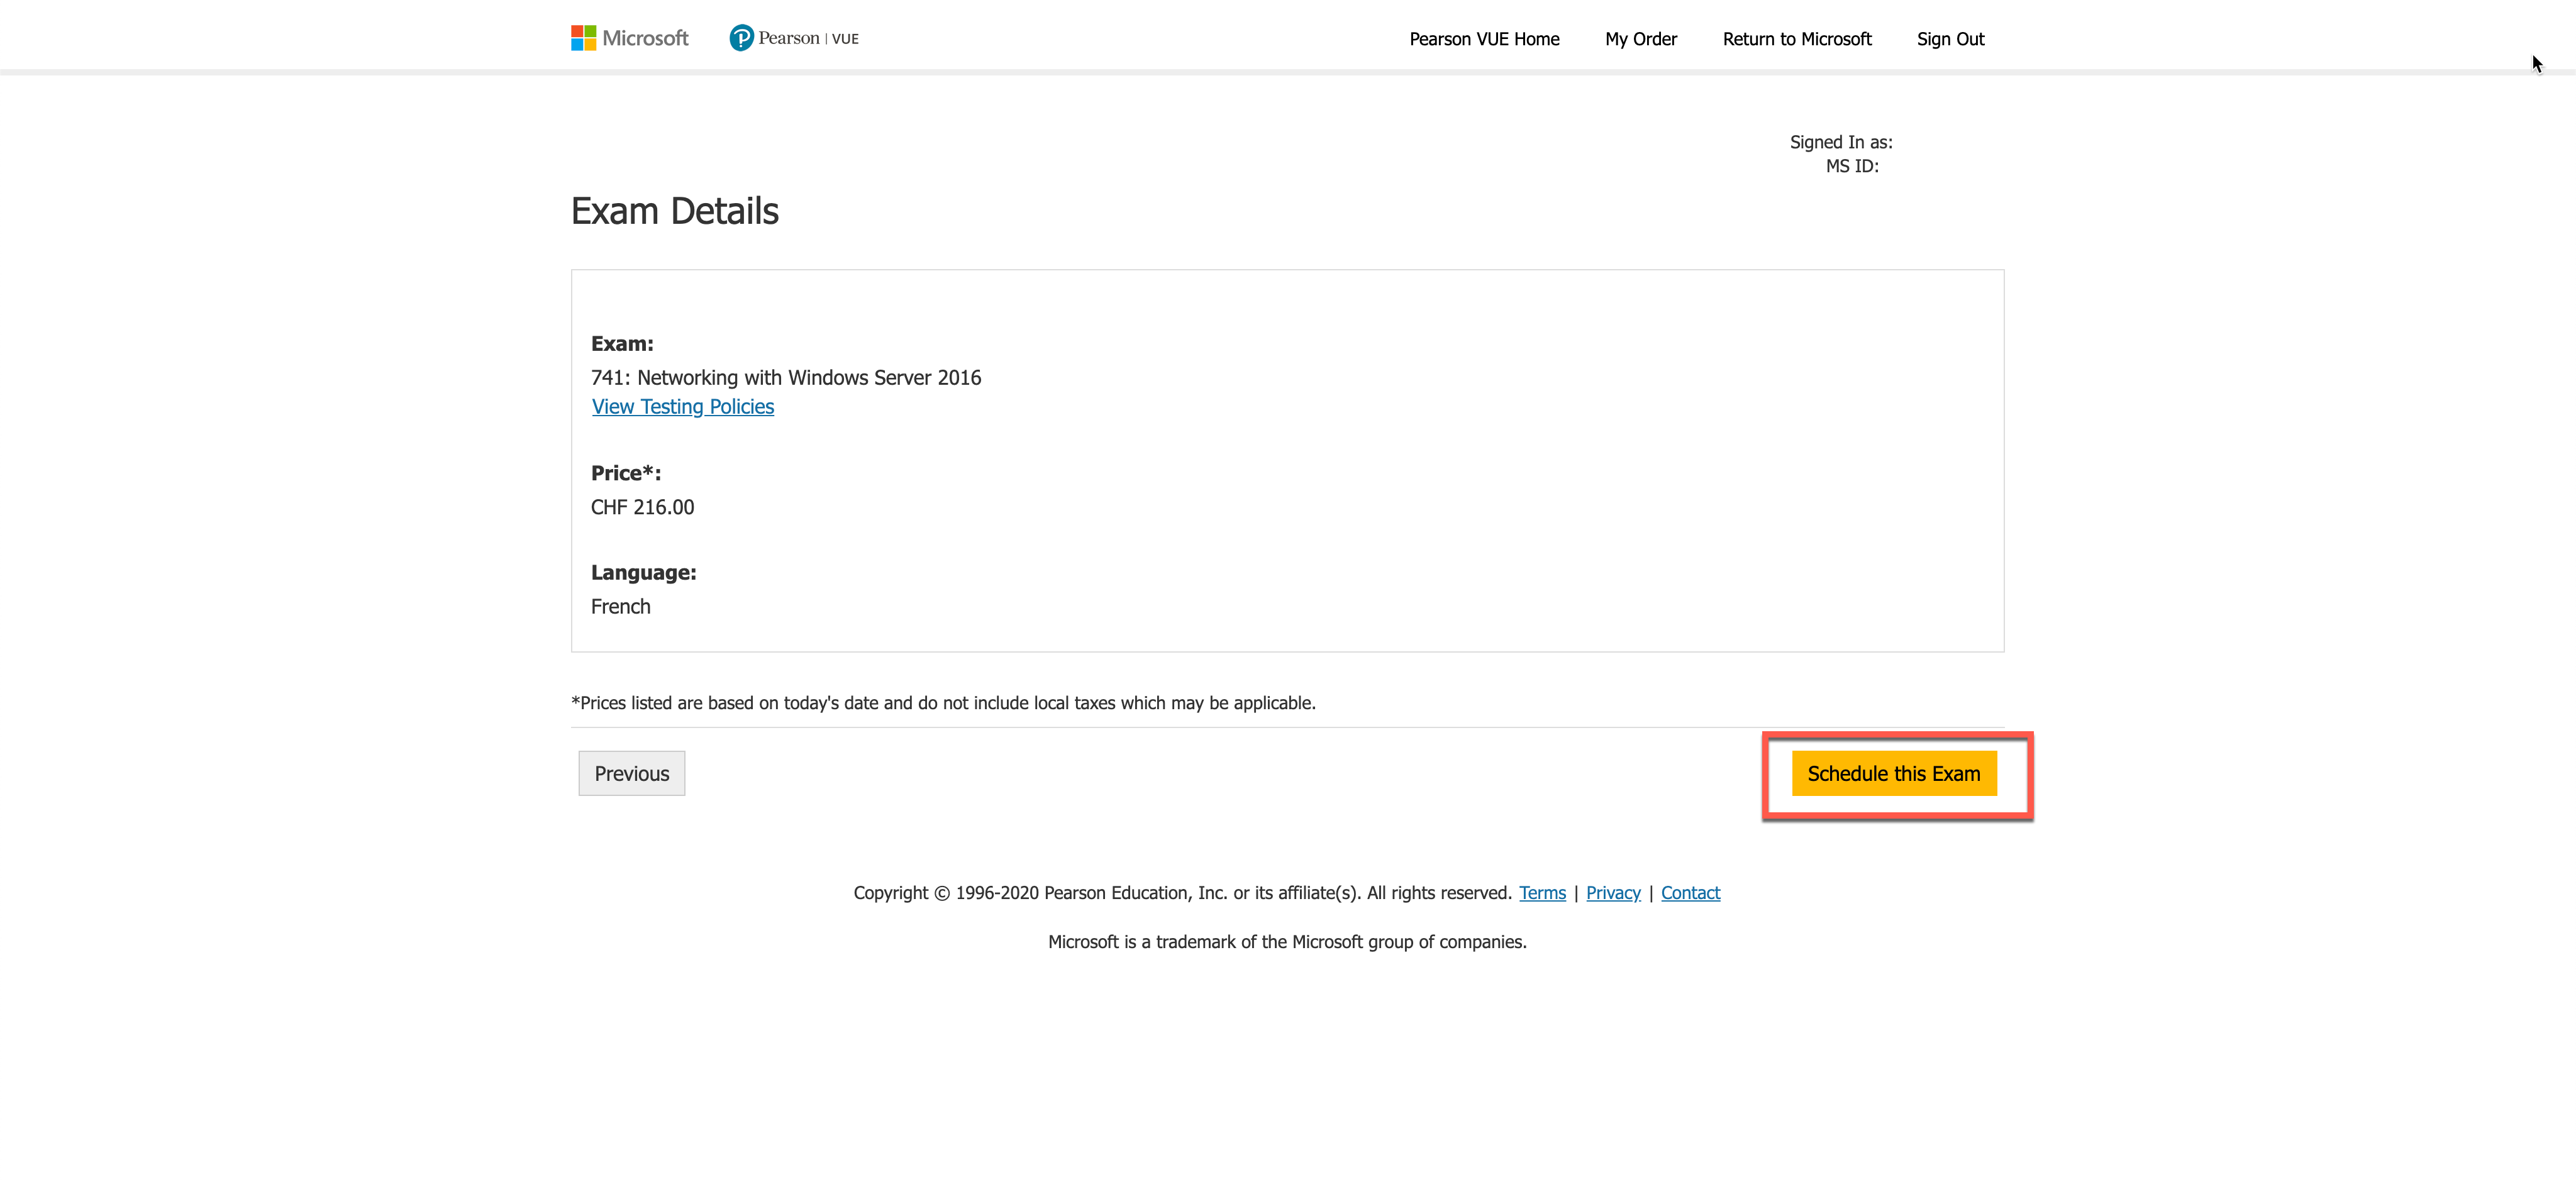
Step 10 – Select “Schedule exam” on the exam detail screen
Once the exam selected, the detail of the exam will be displayed. From there just schedule now your exam.

Step 11 – Please add/update your personal informations.
Please check your personal information. Complete or update those data and then click on “Save & continue”.
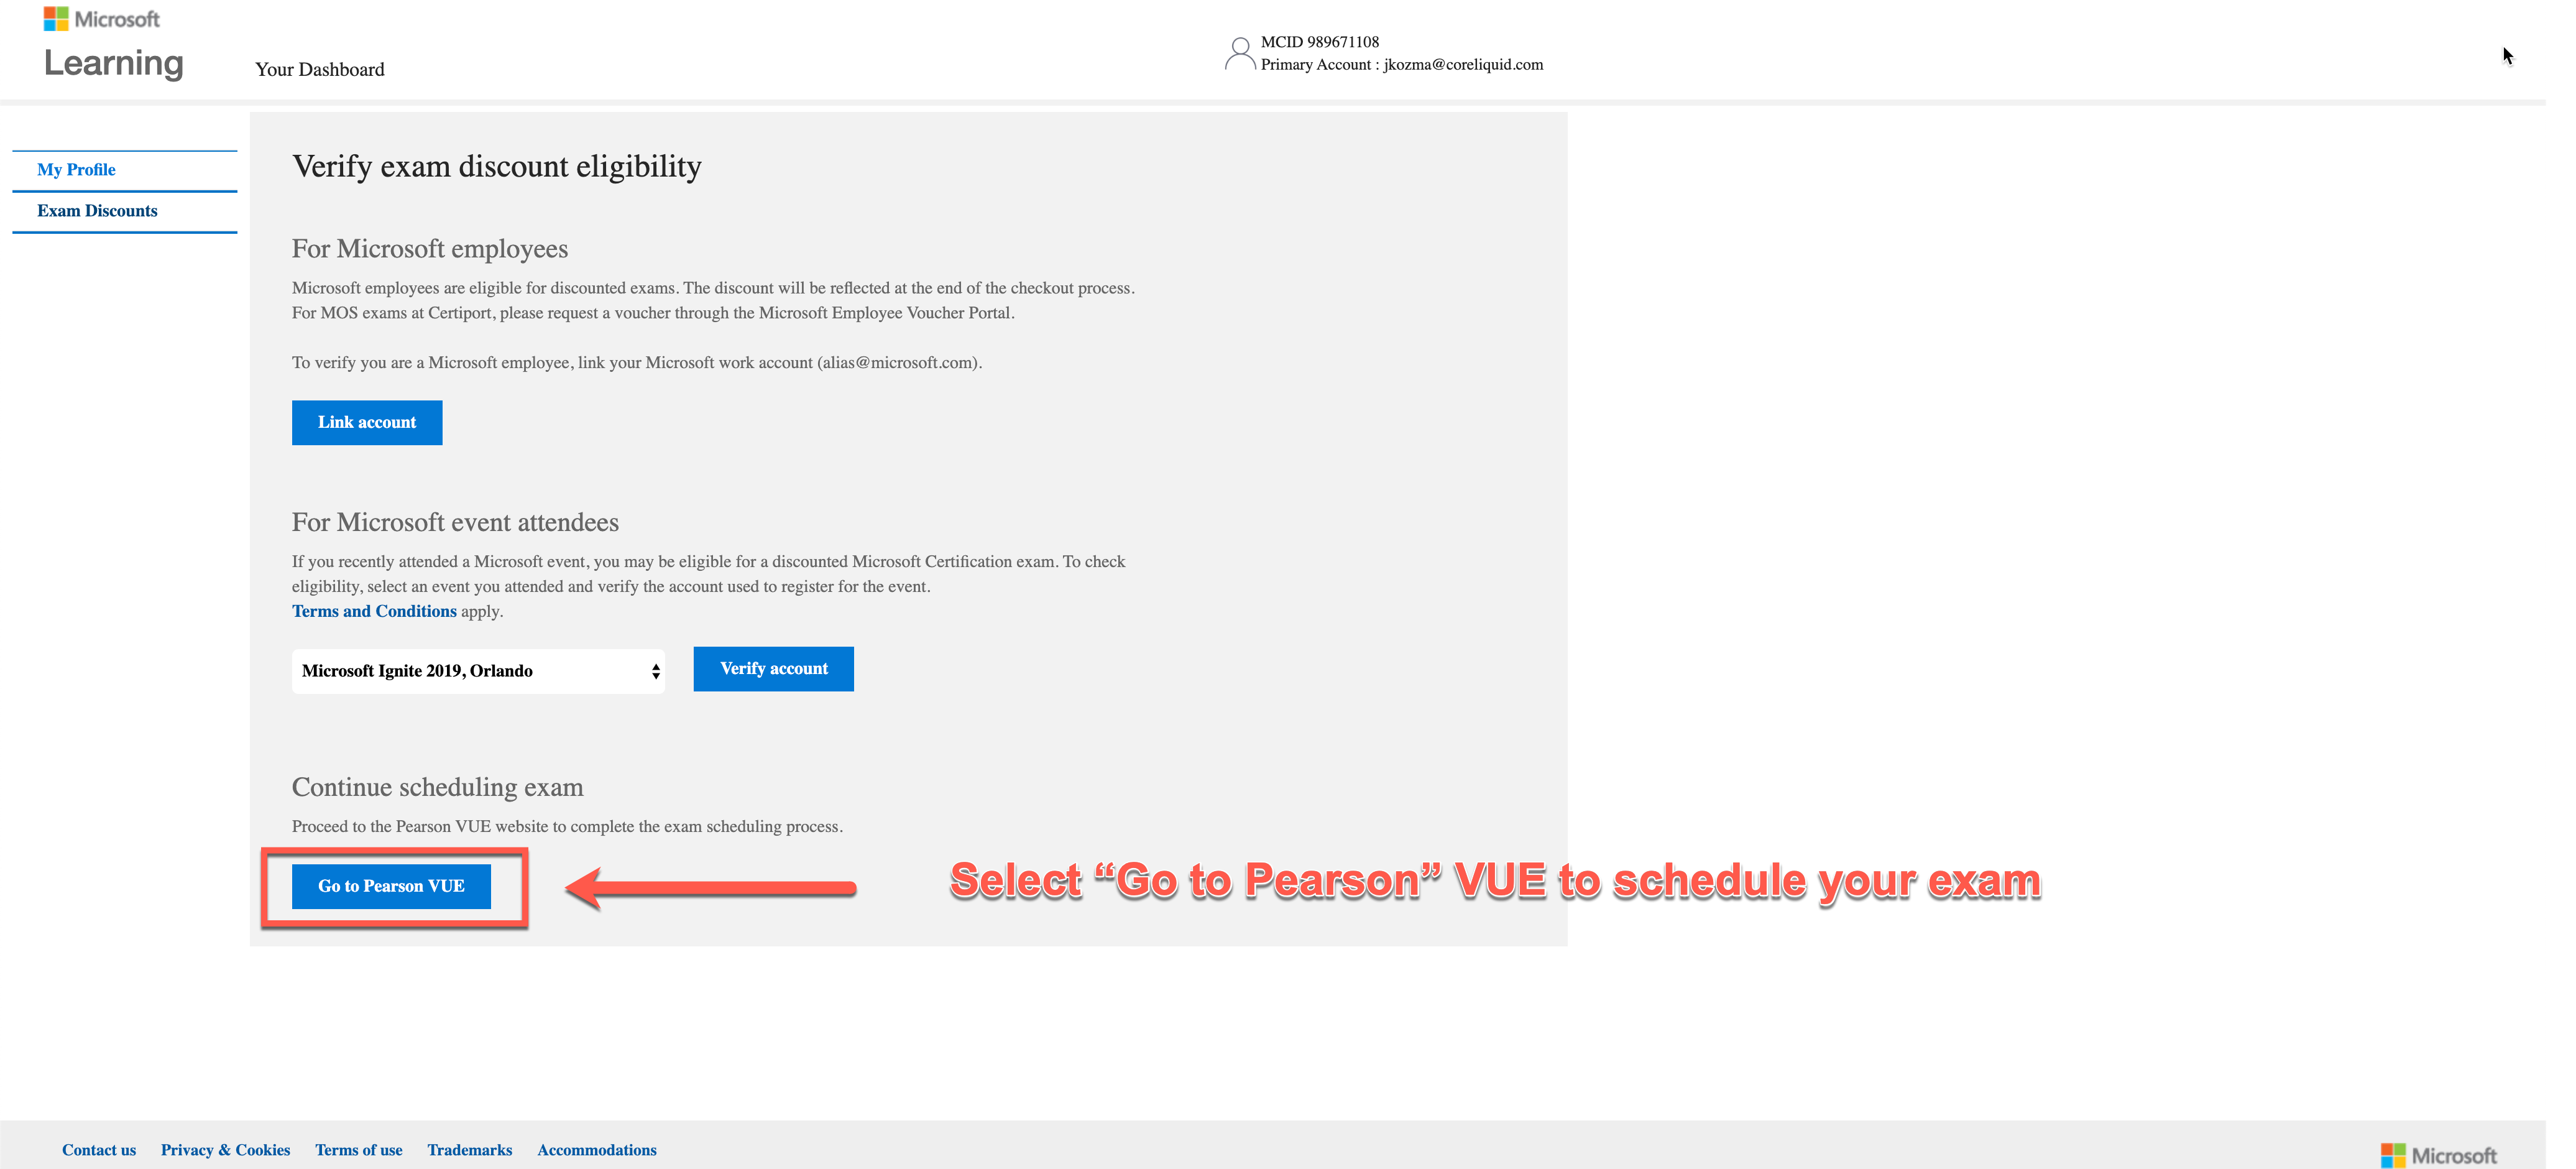
Step 12 – Got directly to the Pearson VUE to schedule your exam.
Then click directly on “Go to Pearson VUE” in order to schedule the date of your exam.
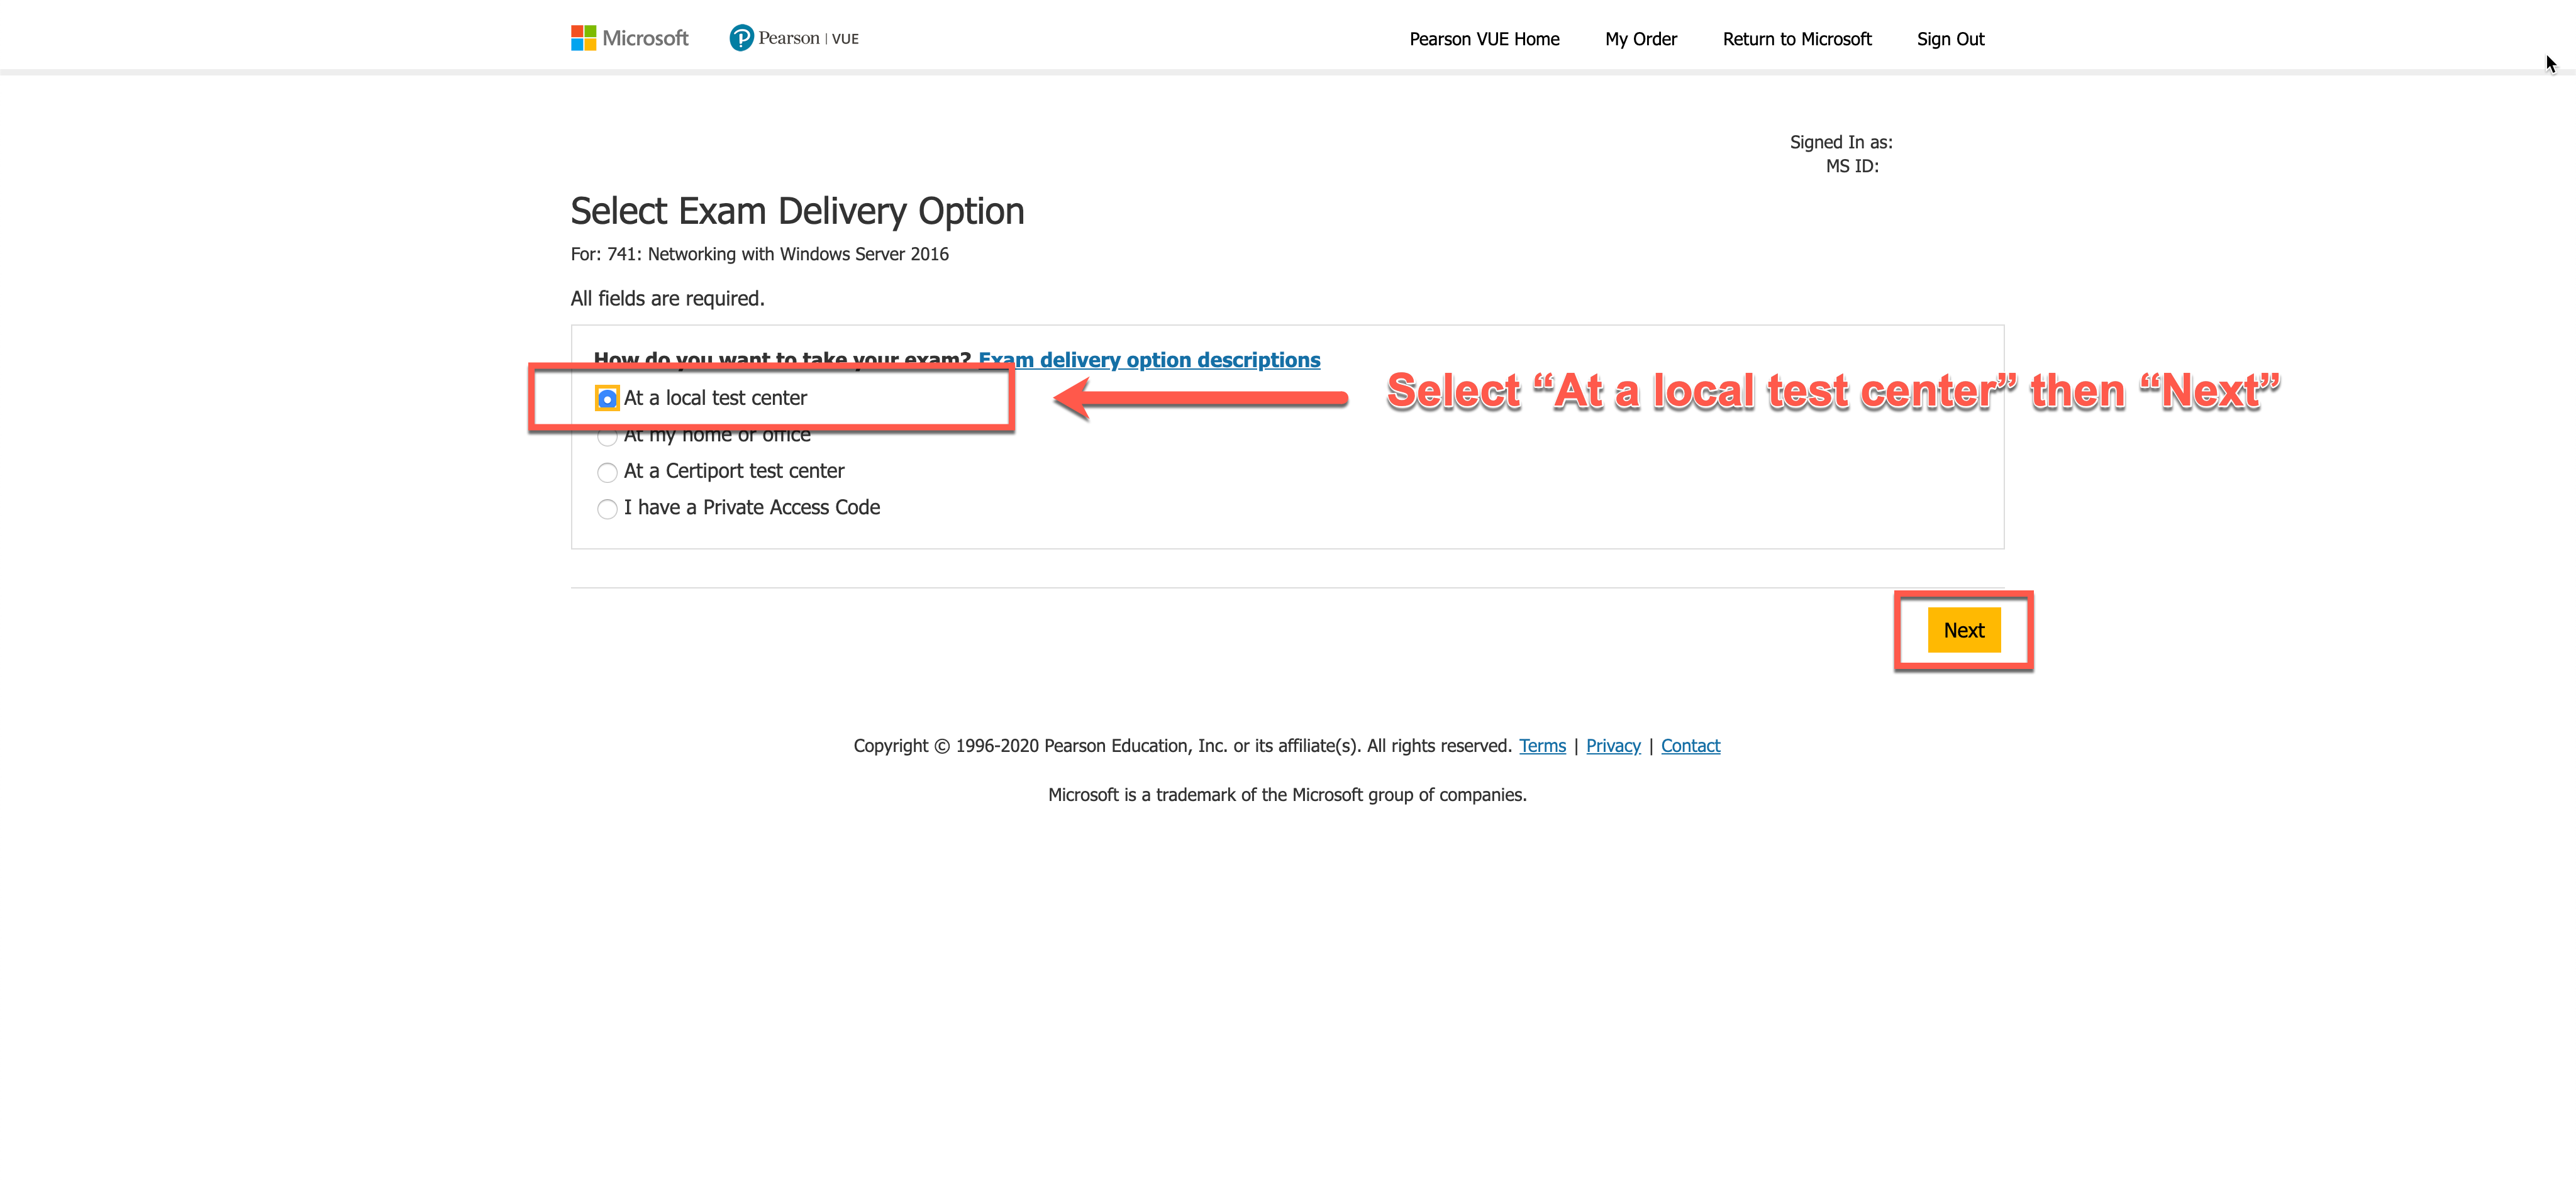
Step 13 – Select the exam delivery option.
Select the way you want to take the exam. For this option you need to select “At local test center”.
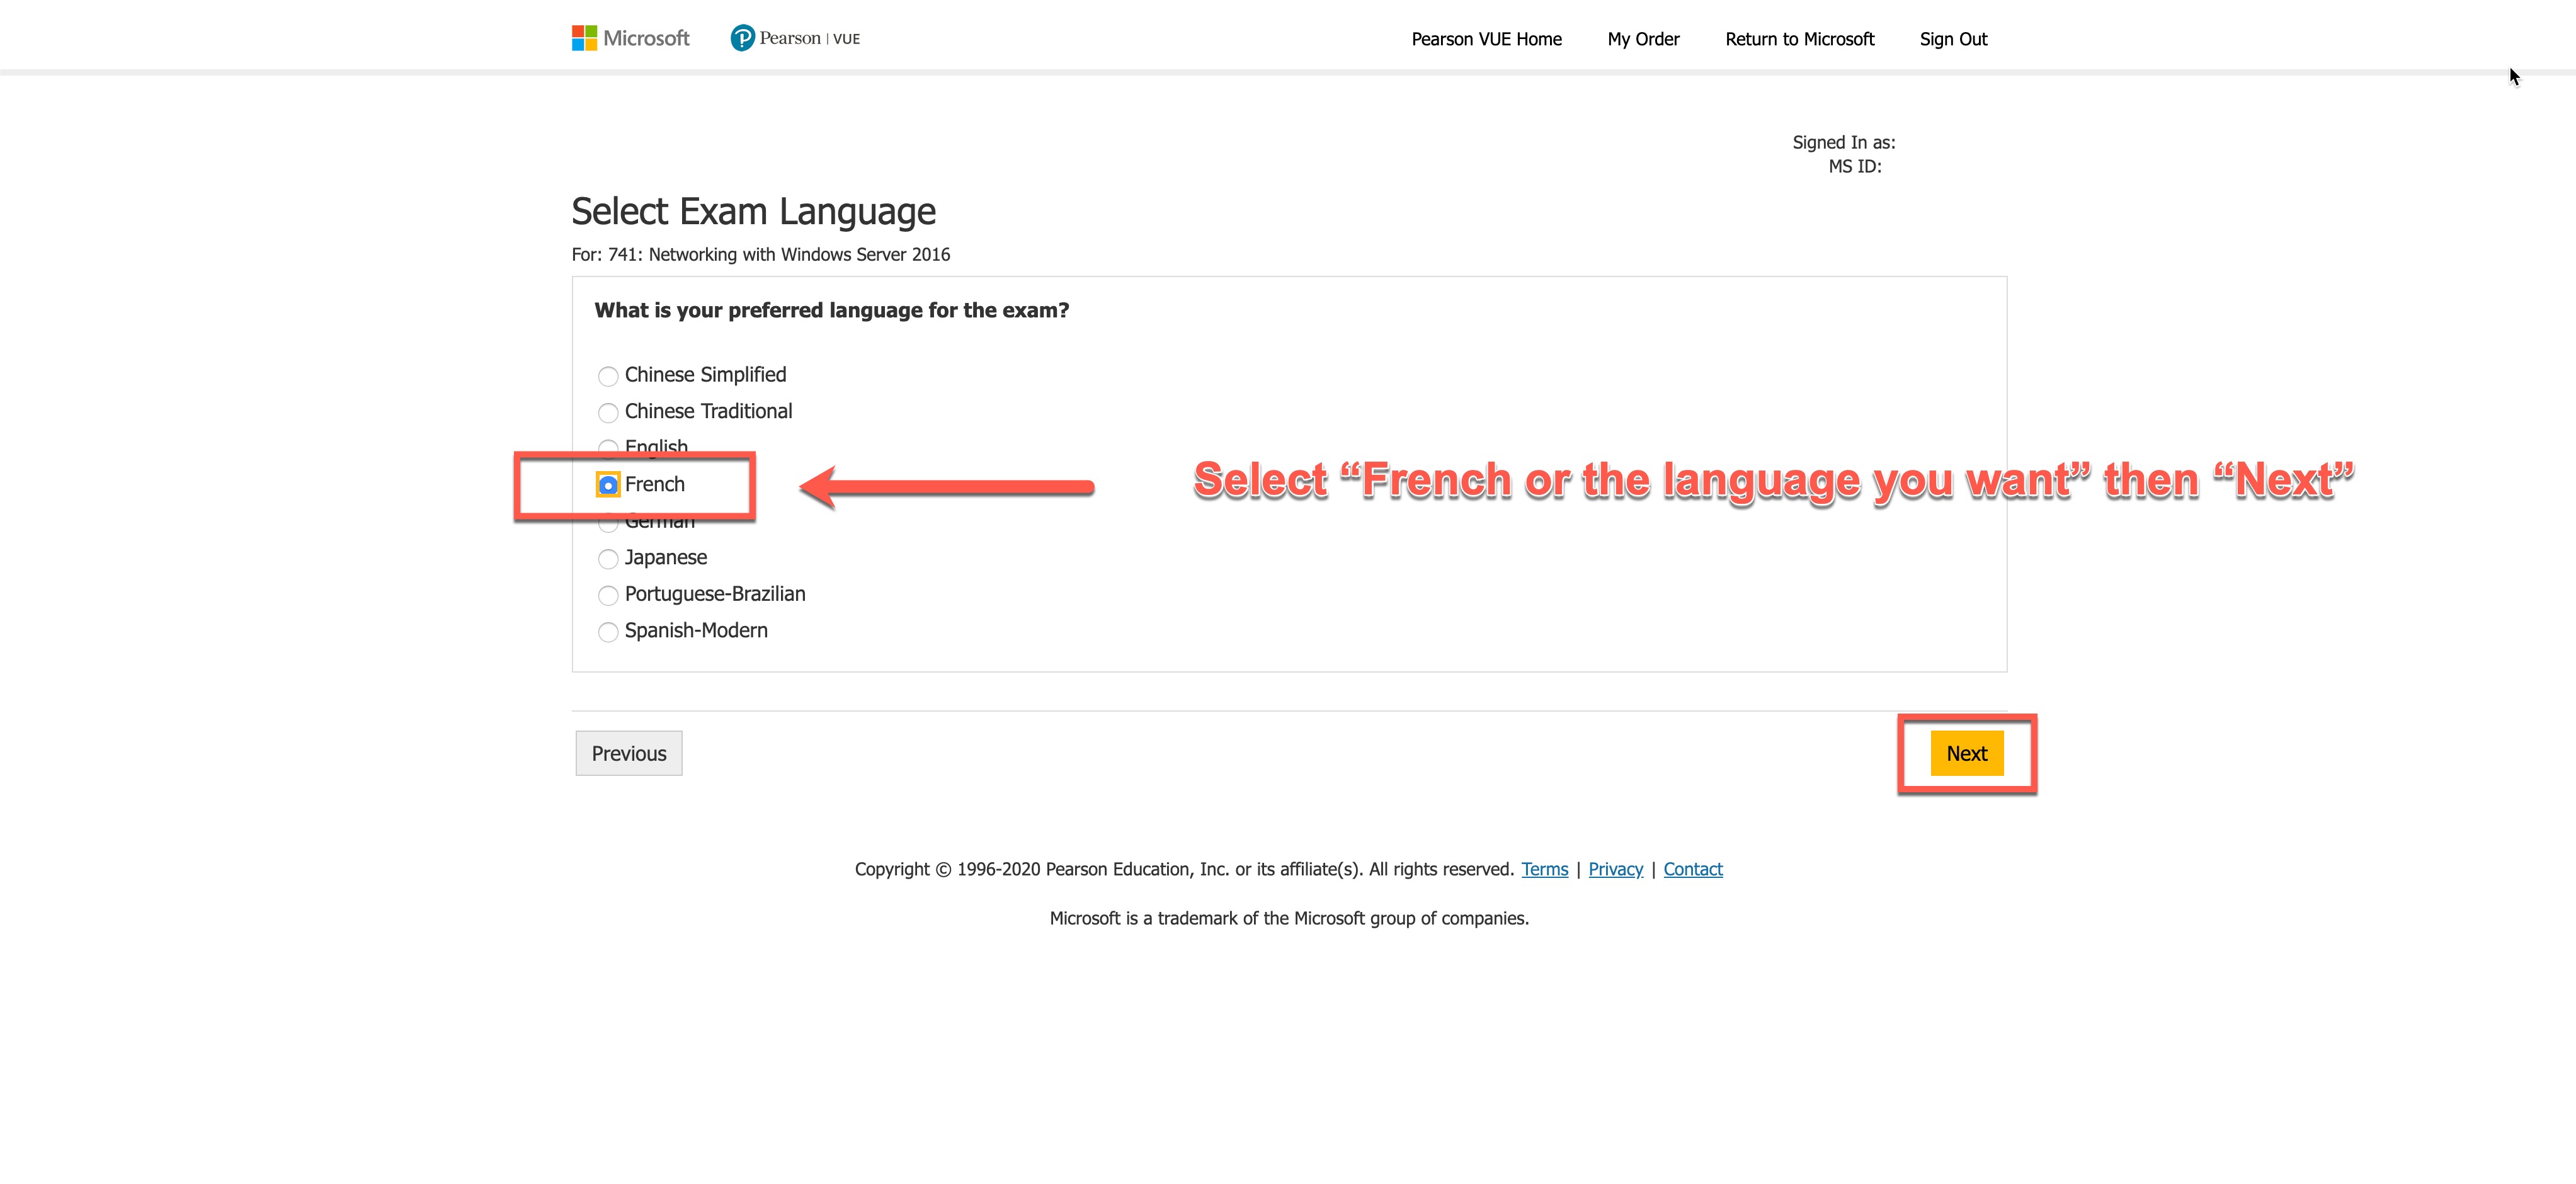
Step 14 – Choose the exam language you want.
Select the language you would like for your exam. Here for the example we choose “French”.
Step 15 – Schedule your exam.
A summary screen appears regarding the data you have selected. The next step will allow now you to select the date you want to have you exam and the ISEIG Test Center.
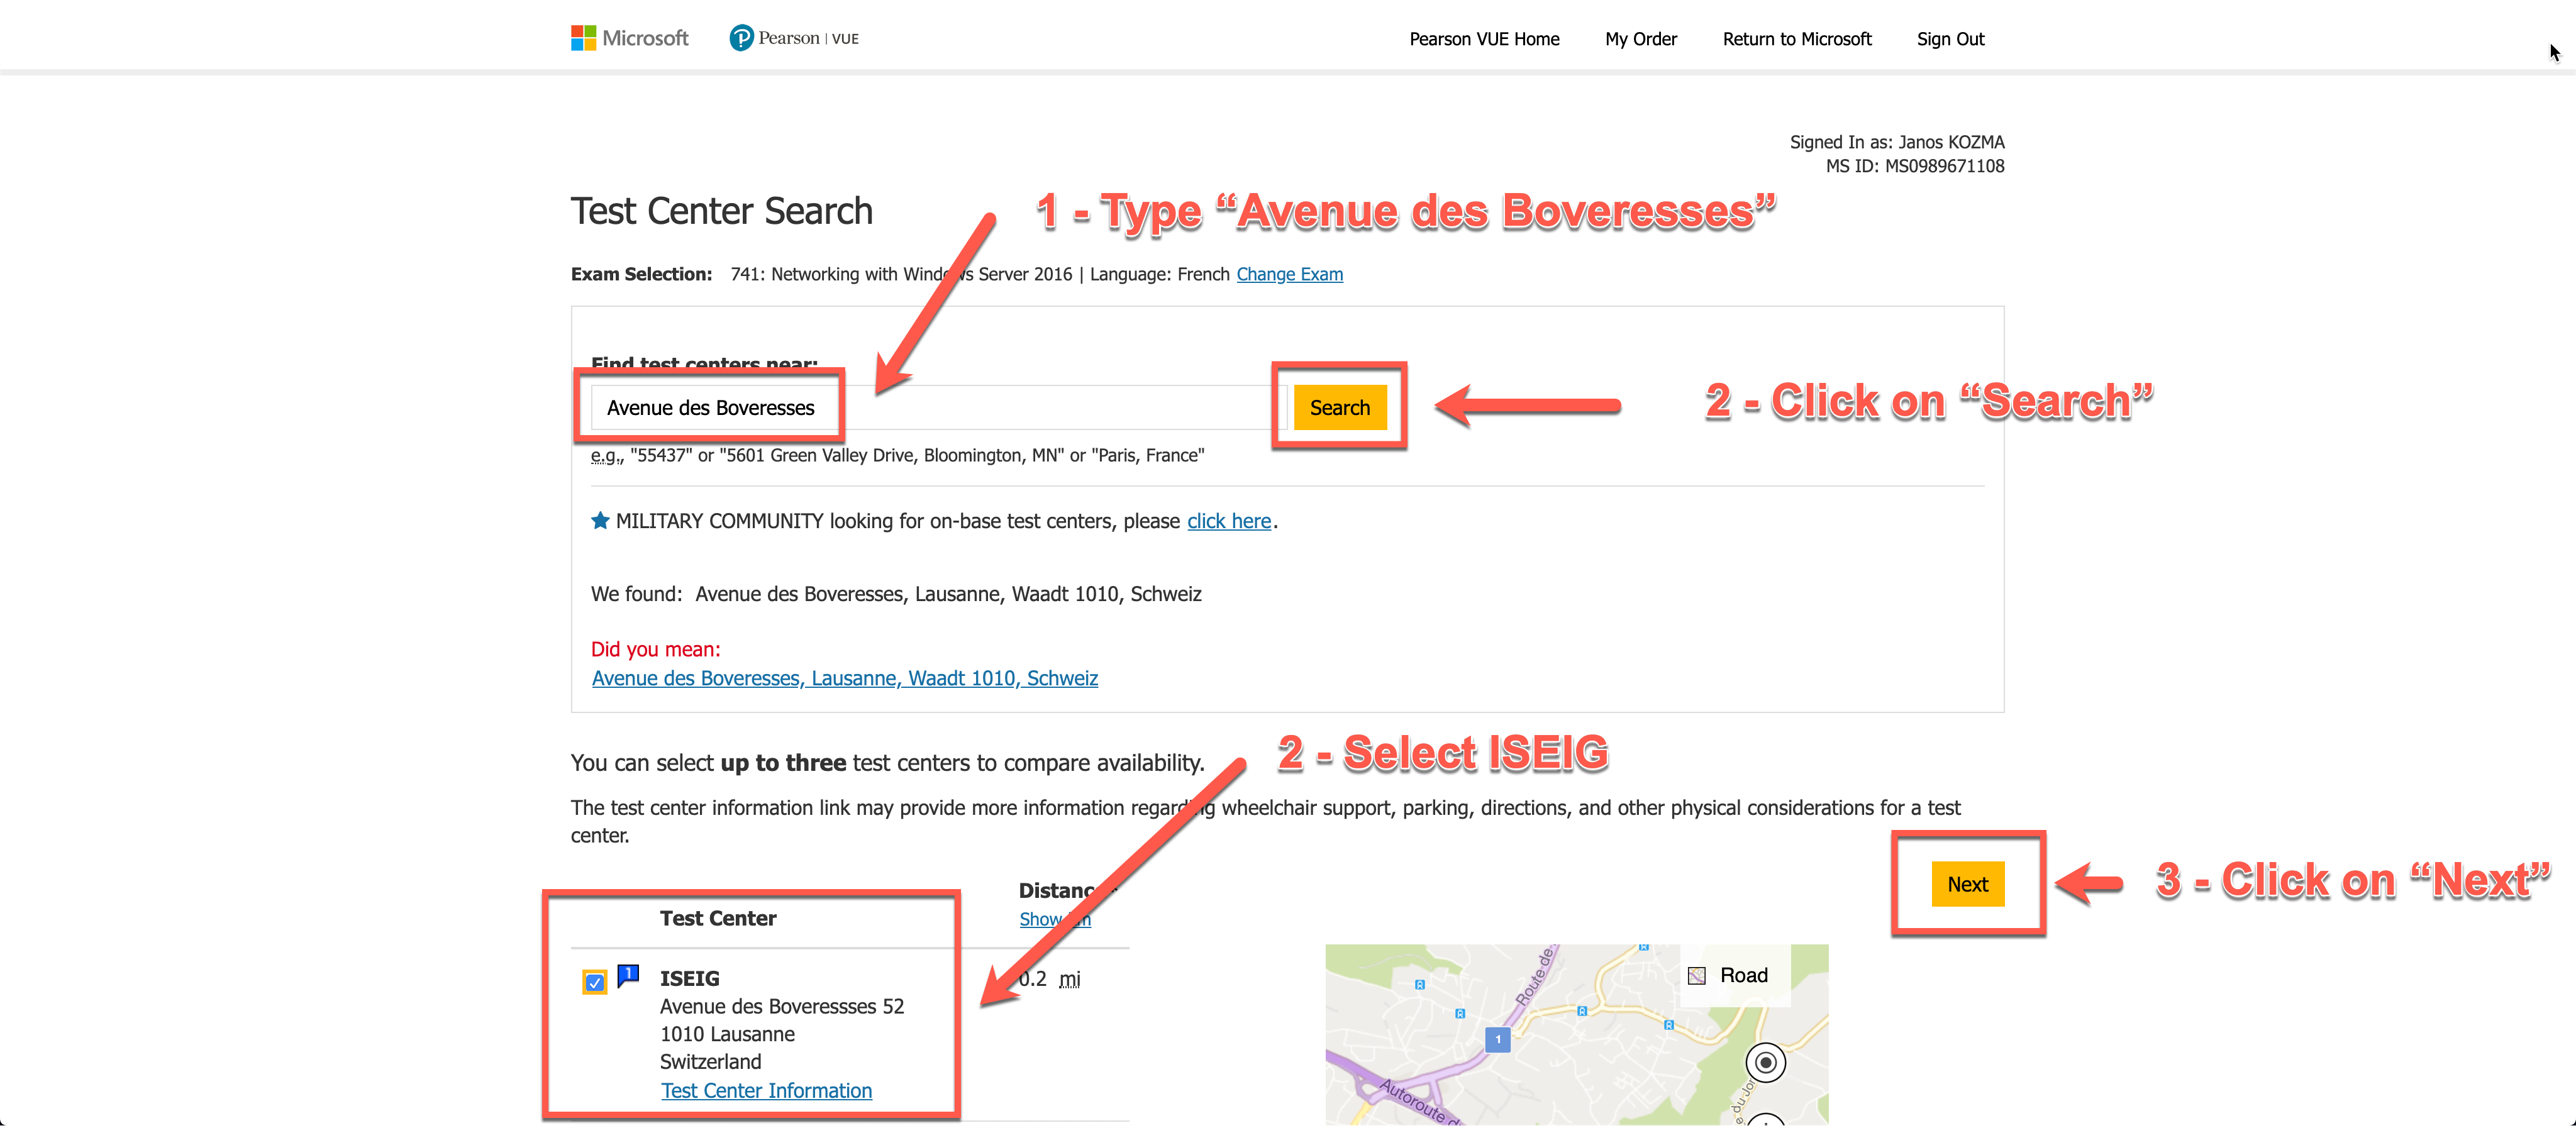
Step 16 – Search for ISEIG Test Center
Search for ISEIG Test Center. Type in the location “Avenue des Boveresses”, then click on Search. Down on the list of Test Center, select ISEIG, then click on “Next”.
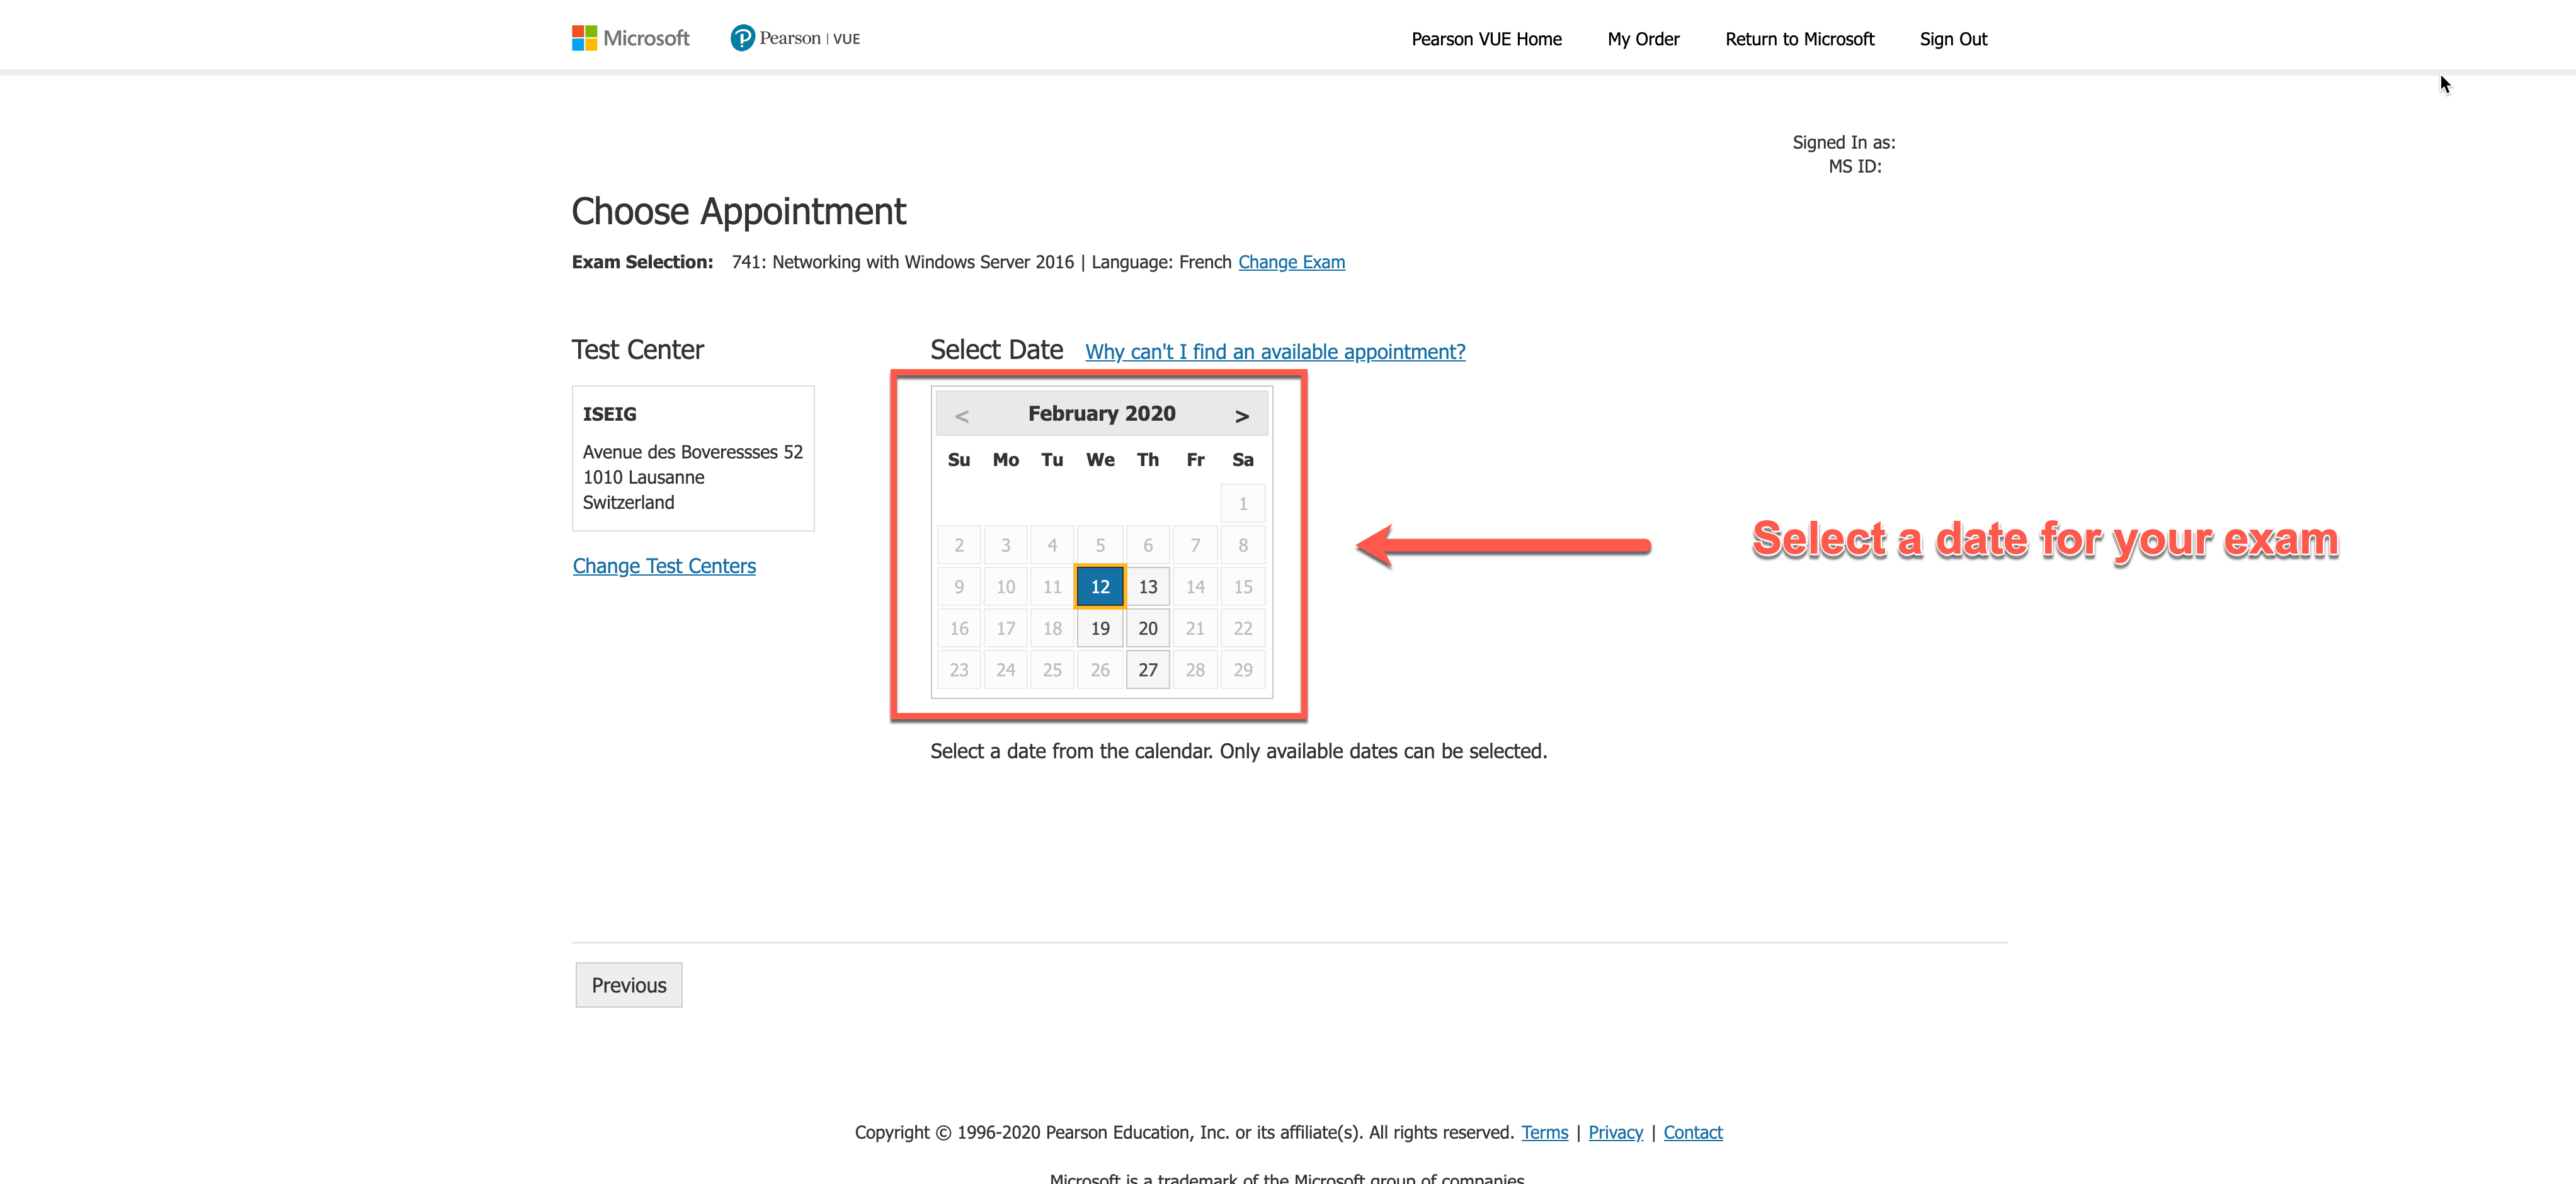
Step 17 – Choose the available date you want to pass the exam.
Now the system presents available dates. Select the dates which bet fits to your agenda. The system will the display the available time slots.
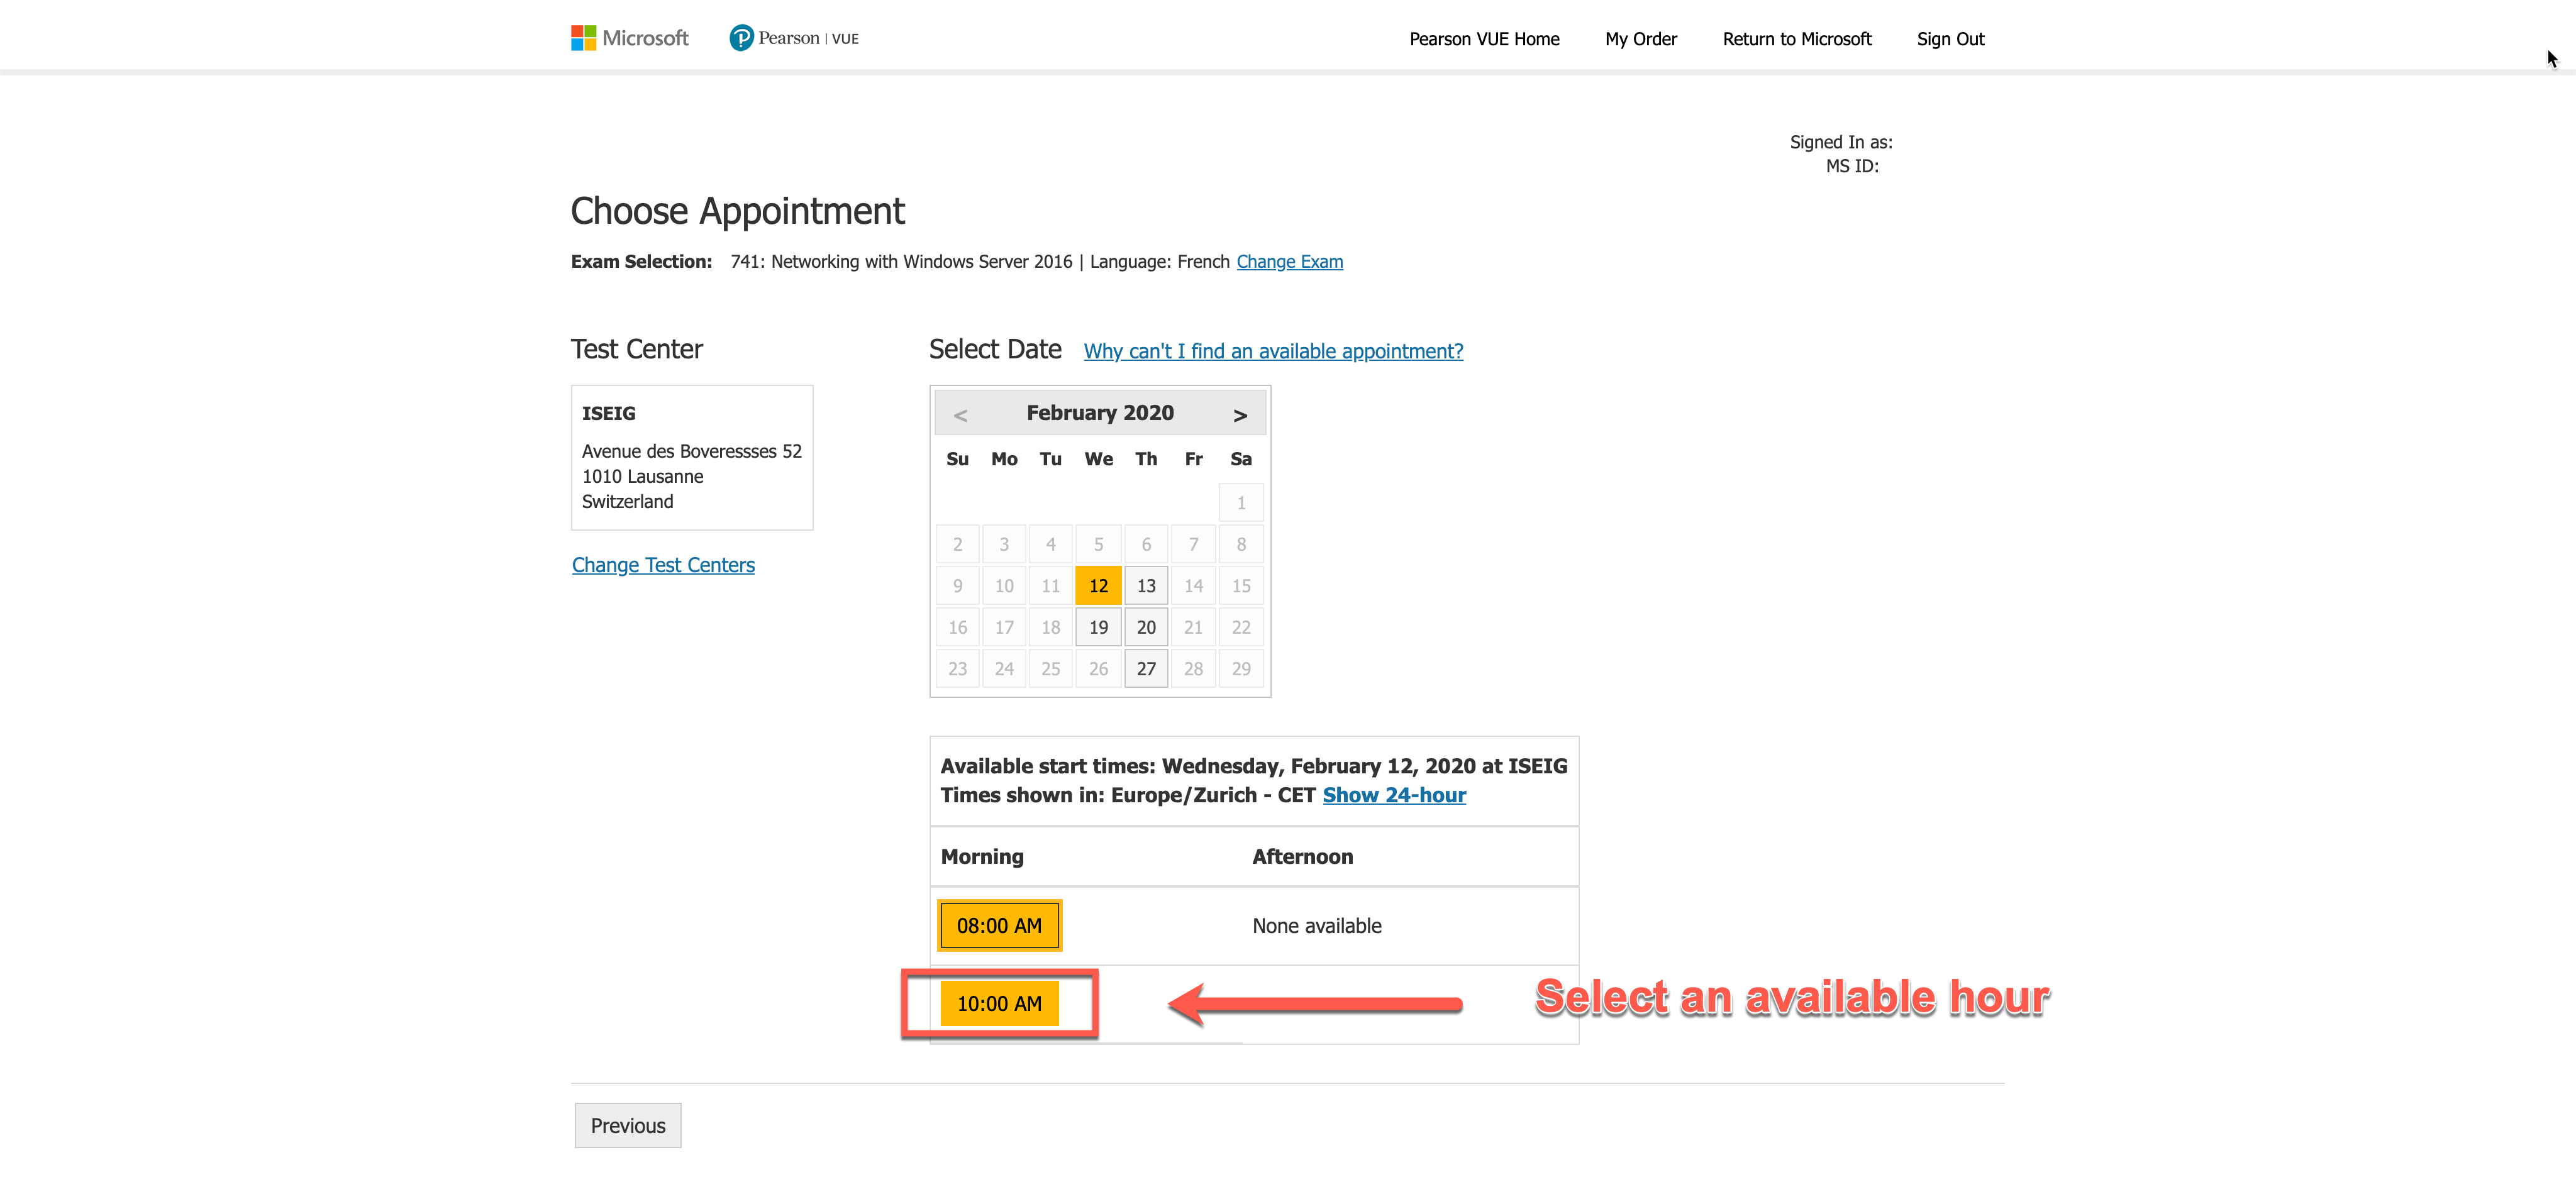
Step 18 – Choose the available time slot.
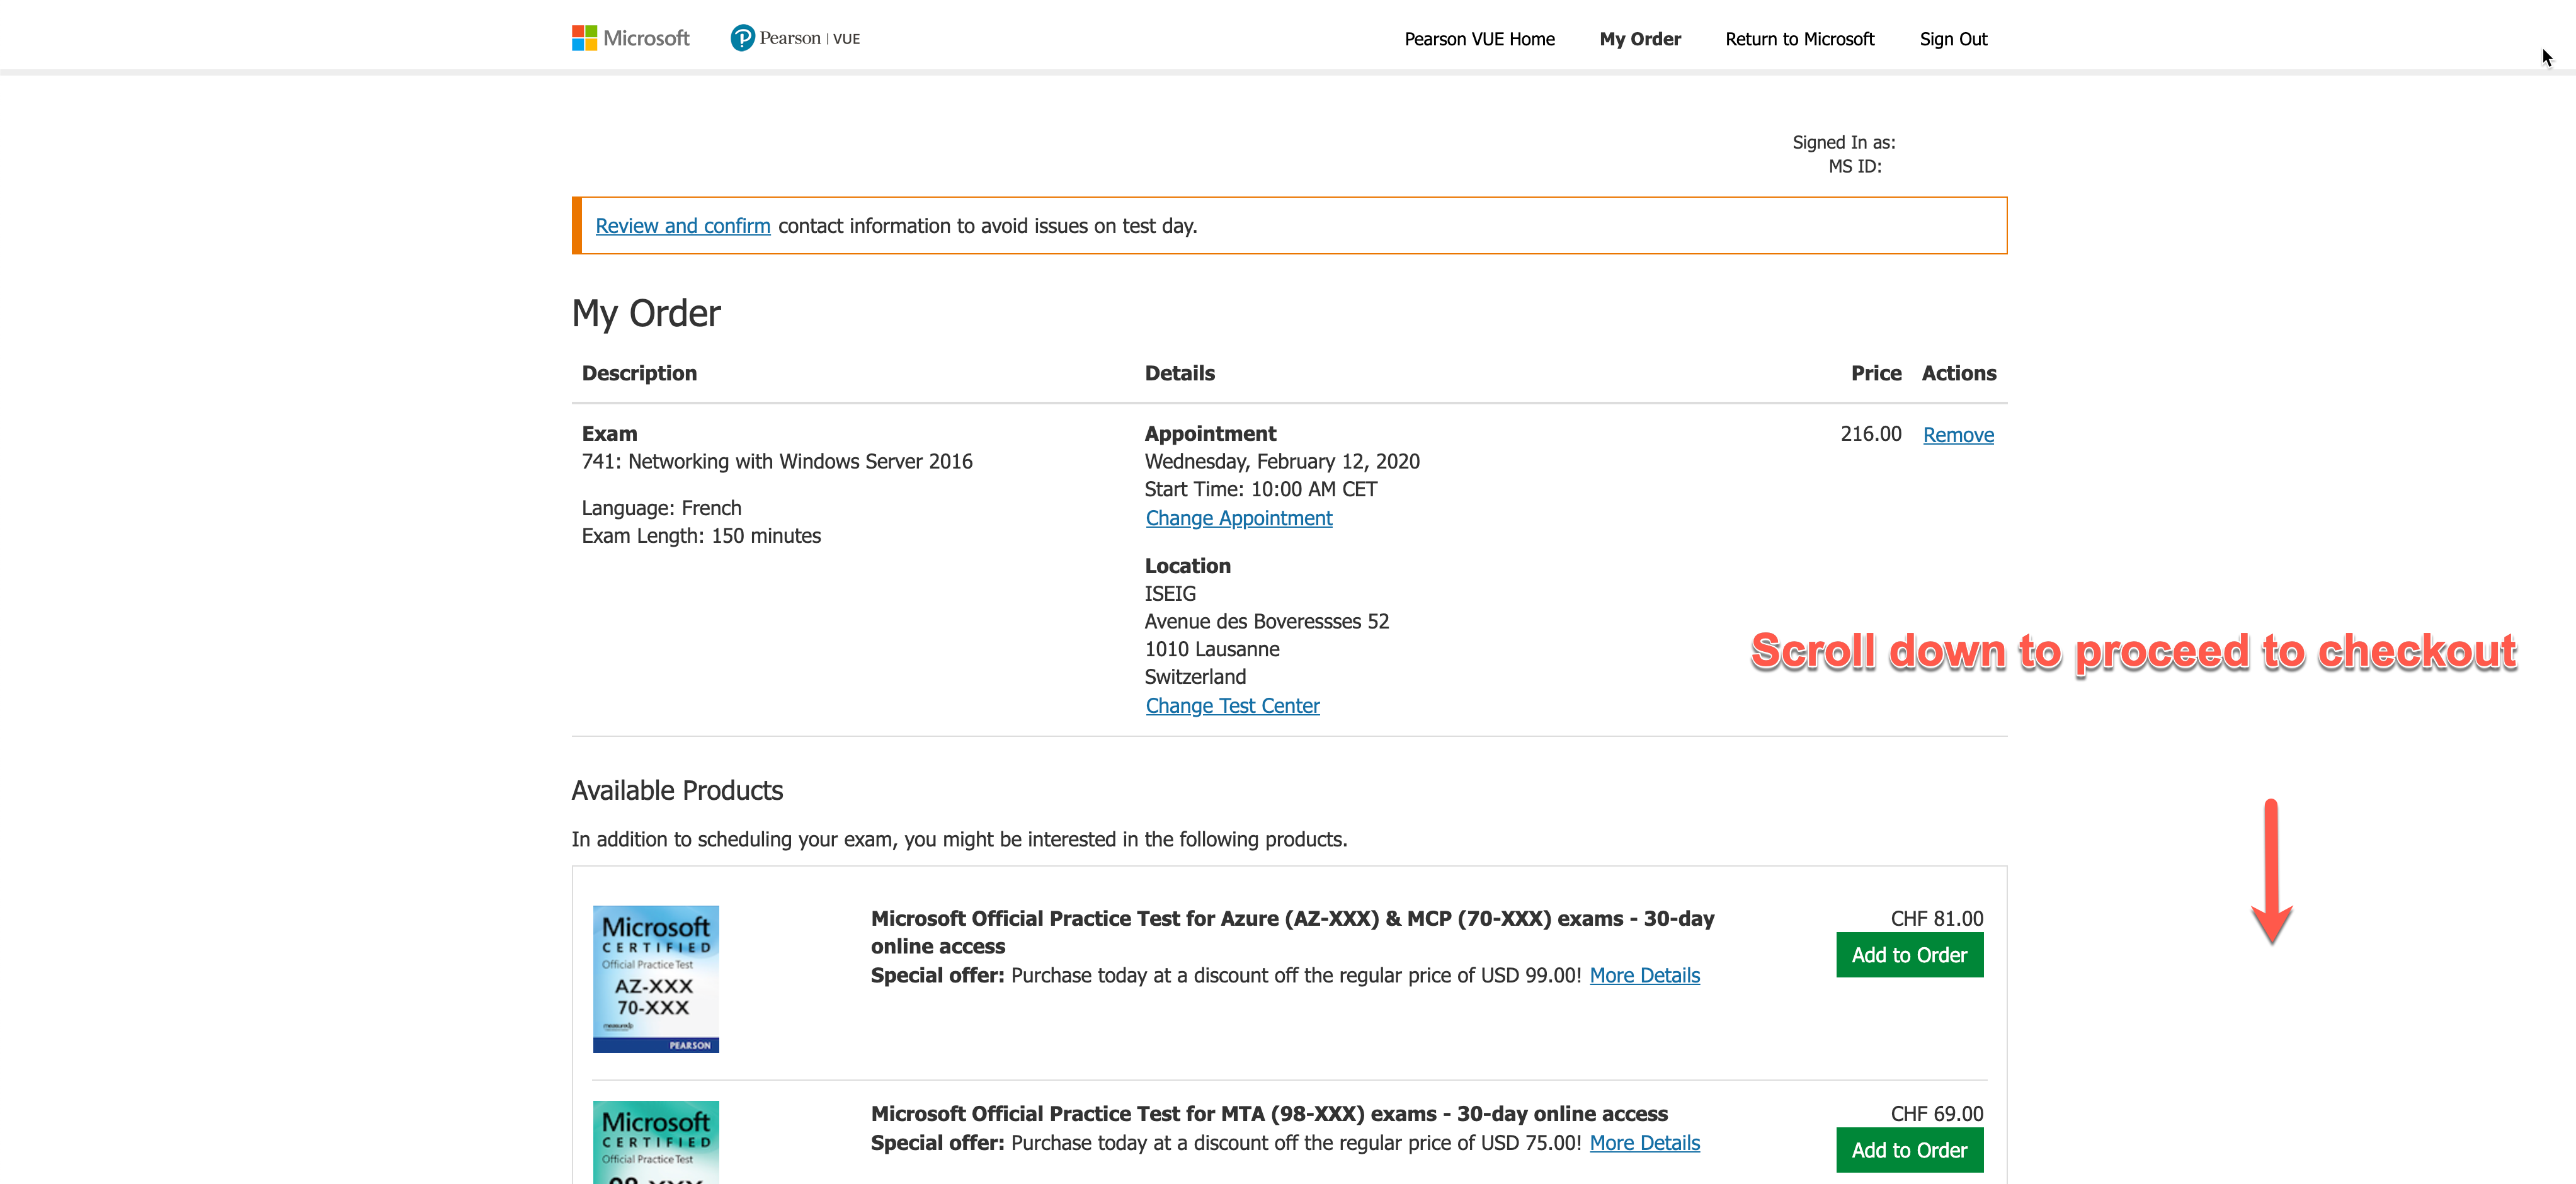
Step 19 – Scroll dow the page to proceed to the checkout.
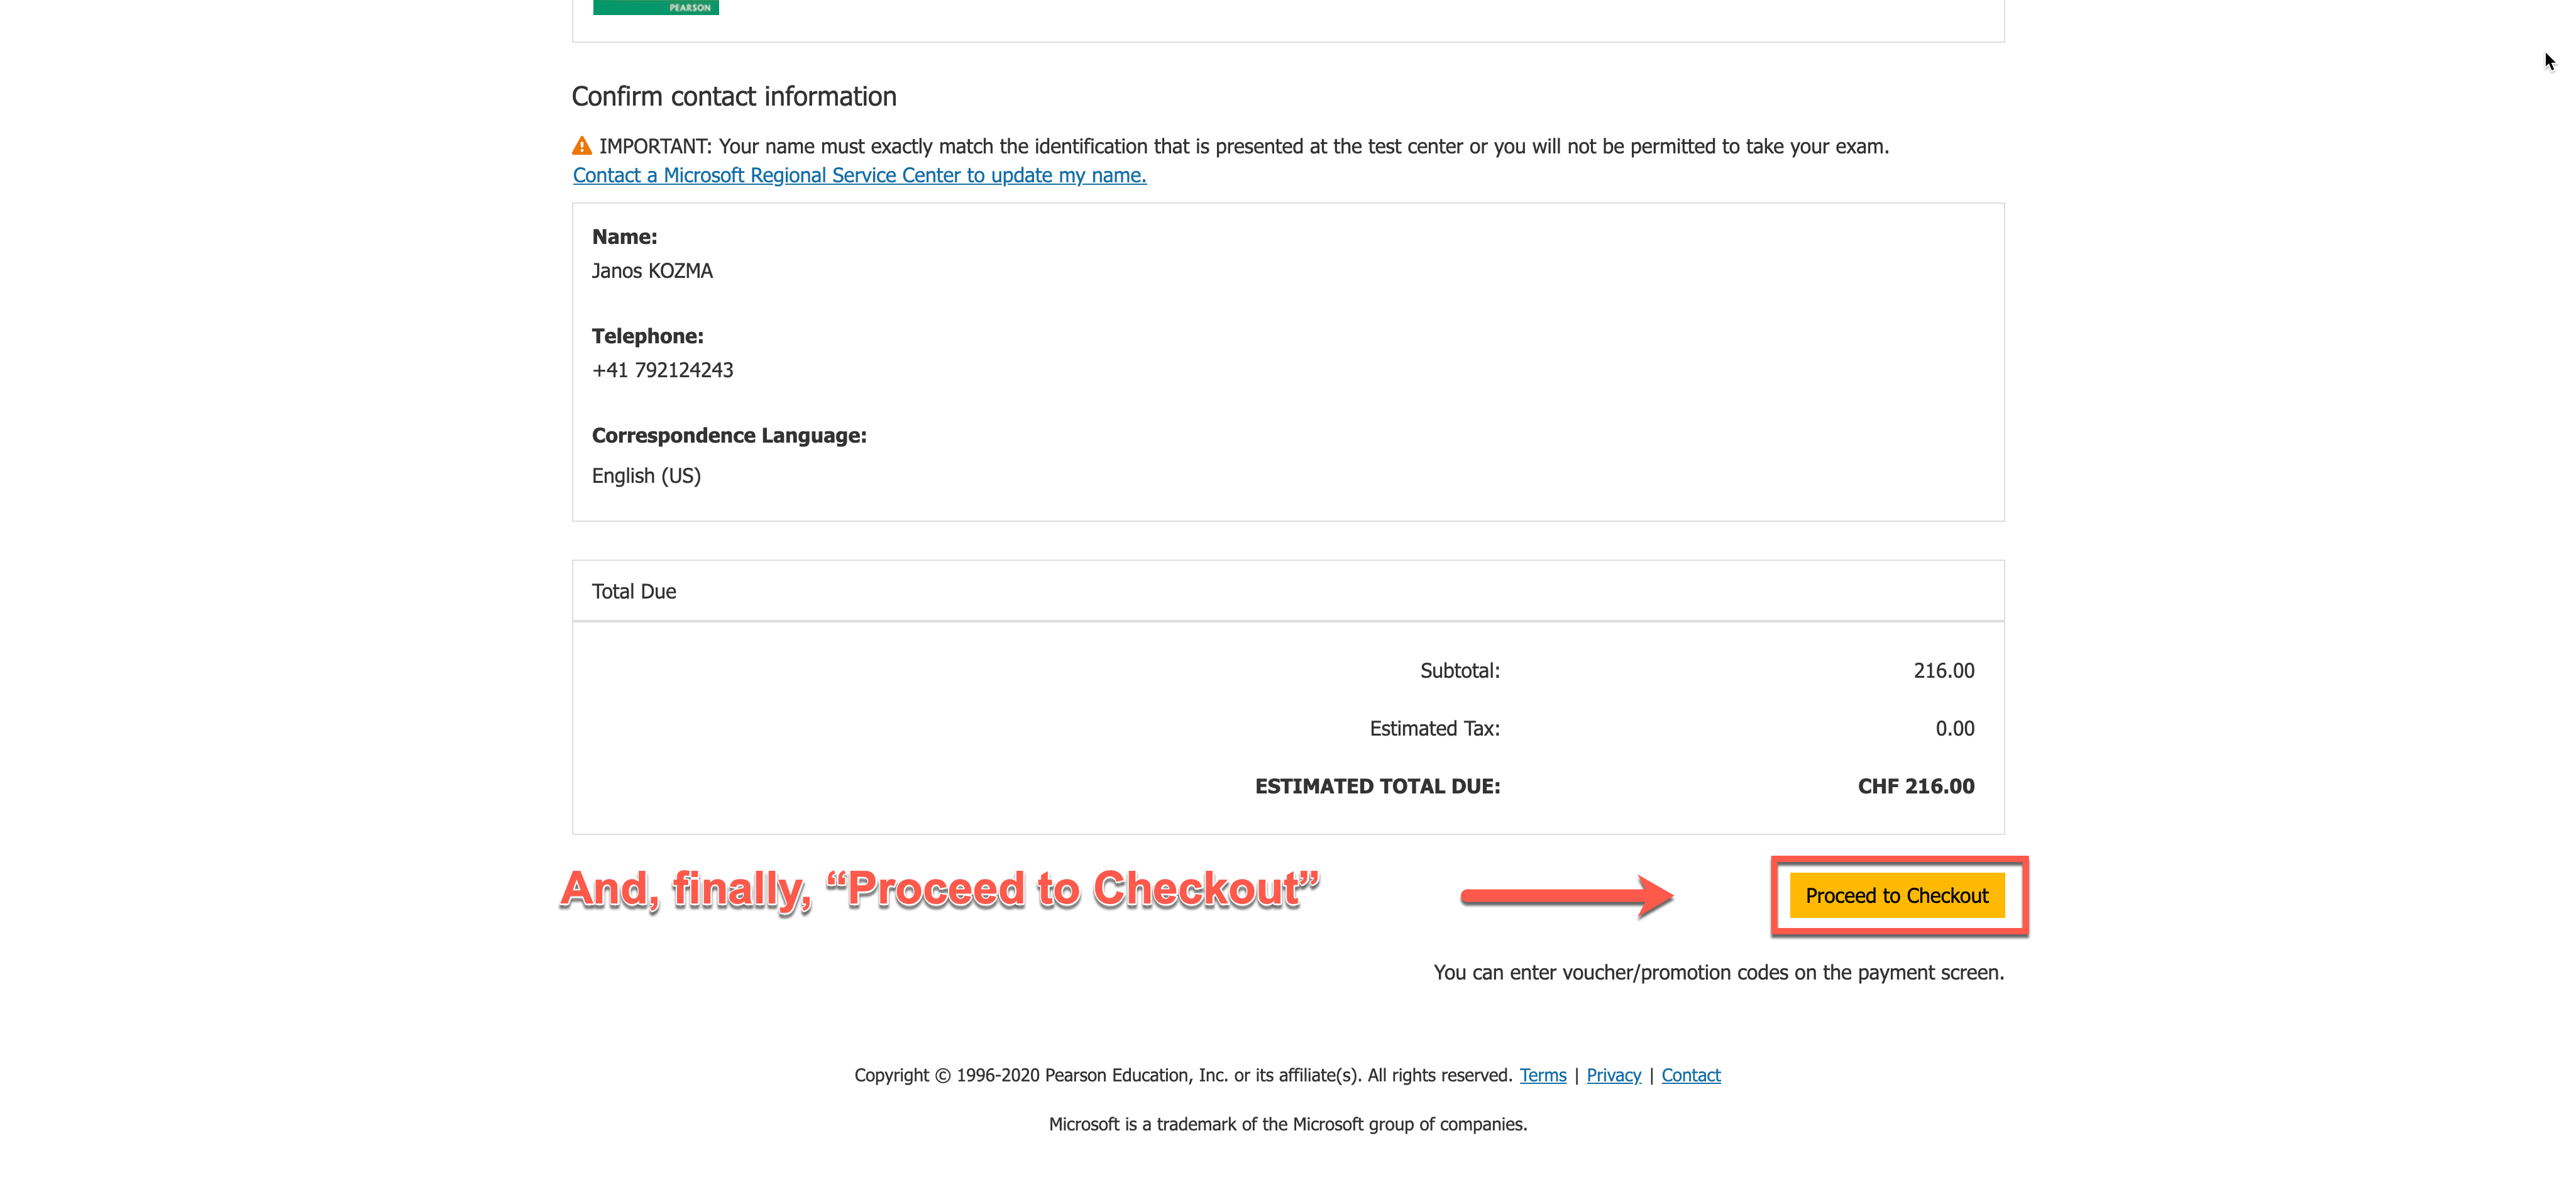
Step 20 – And finally proceed to the checkout.